How to build a Calculator App with JavaScript
This epic tutorial provides a solid workout for JavaScript newbies by describing how a simple calculator application can be developed with the language.
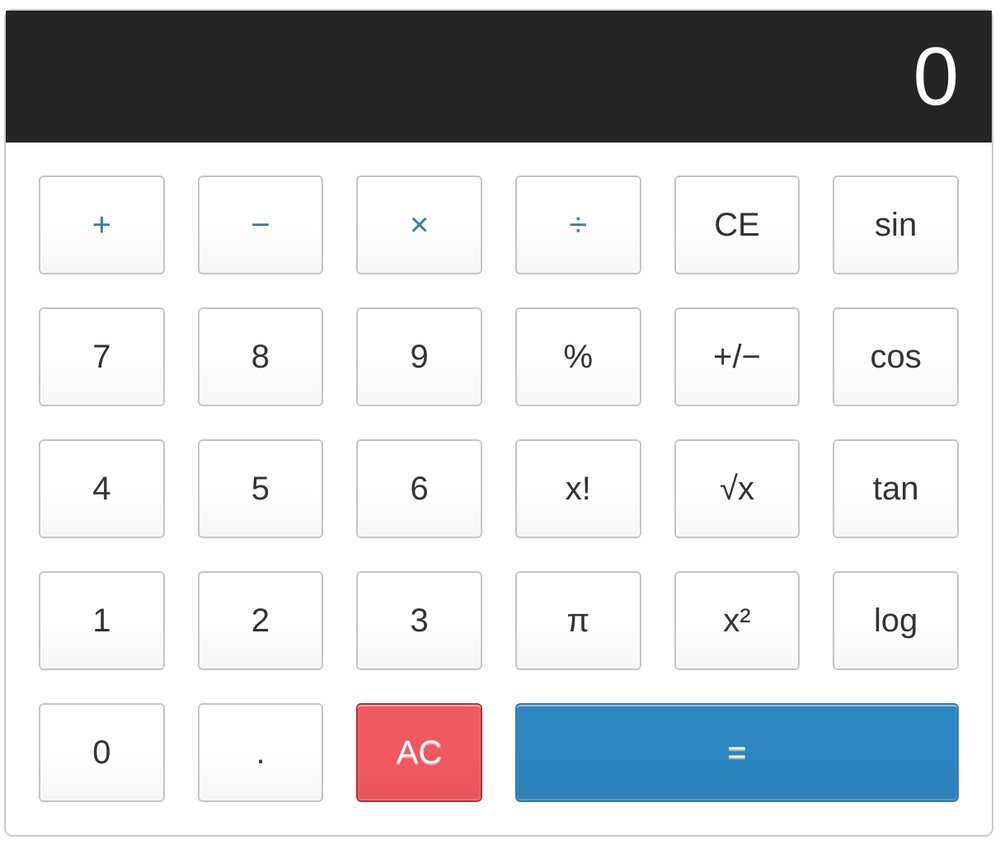
The calculator app we’ll develop in this tutorial is a very simple one. It is more or less in the manner of those calculators found at grocery stores. The layout of the app was crafted with CSS grid. If you’d like to learn how it was achieved, be sure to check out this tutorial as this one focuses only on the JavaScript logic employed to make the calculator work.
Here’s a live demo of the completed project. You can play around with it to get a feel of what you’ll be building before diving in.
Prerequisites
This tutorial assumes that you have a basic knowledge of JavaScript. I’m going to break down each step as best as I can so it should be easy to follow even if you have no prior experience with building applications in the browser.
Before you begin
You can find the starting point for this tutorial on JSFiddle. It contains all the necessary markup and styles used to build the calculator layout. The markup is almost identical to the final state of the previous tutorial in which I discussed how the calculator layout was crafted, but I made a few minor changes so make sure to use this one instead.
Start by forking the code to a new fiddle, and follow along by typing each step out till the end. Feel free to do this tutorial on other online code playgrounds or on your local machine if you prefer.
Getting started
Anyone should be able to perform the four most common arithmetic operations (addition, subtraction, multiplication and division) on our calculator app by constructing a valid expression using the input buttons, and have the result displayed on the screen. An example of a valid expression is shown below:
12 + 10To construct a valid arithmetic expression, we need to keep track of a few
things: the first operand (12), the operator (+) and the second operand
(10).
Let’s start by creating an object to help us keep track of these values. Add the following code at top of the JavaScript pane in JSFiddle:
const calculator = {
  displayValue: '0',
  firstOperand: null,
  waitingForSecondOperand: false,
  operator: null,
};
The calculator object above consists of everything that we need to construct
a valid expression:
displayValueholds a string value that represents the input of the user or the result of an operation. It’s how we keep track of what should be displayed on the screen.firstOperandwill store the first operand for any expression. It’s set tonullfor now.- The
operatorkey will store the operator for an expression. Its initial value is alsonull. waitingForSecondOperandessentially serves as a way to check if both the first operand and the operator have been inputted. If it’strue, the next numbers that the user enters will constitute the second operand.
Update the display
At the moment, the calculator screen is blank. We need the contents of the
displayValue property to be shown on the screen at all times. We will create a
function for this purpose so that anytime an operation is performed in the app,
we can always invoke it to update the screen with the contents of
displayValue.
Go ahead and type this below the calculator object:
function updateDisplay() {
  // select the element with class of `calculator-screen`
  const display = document.querySelector('.calculator-screen');
  // update the value of the element with the contents of `displayValue`
  display.value = calculator.displayValue;
}

updateDisplay();
If you look at the HTML code for the app, you’ll see that the “screen” is really just a disabled text input:
<input type="text" class="calculator-screen" value="" disabled />We can’t type into it directly with the keyboard, but we can change its value
with JavaScript. And that’s what the updateDisplay function does. Now you
should see zero displayed on the screen of the calculator.
Handle key presses
We have four sets of keys on the calculator: digits (0-9), operators (+, −, ⨉, ÷, =), a decimal point (.) and a reset key (AC). In this section, we’ll listen for clicks on the calculator keys and determine what type of key was clicked.
Add this code snippet at the bottom of the JavaScript tab:
const keys = document.querySelector('.calculator-keys');
keys.addEventListener('click', (event) => {
  // Access the clicked element
  const { target } = event;

  // Check if the clicked element is a button.
  // If not, exit from the function
  if (!target.matches('button')) {
    return;
  }

  if (target.classList.contains('operator')) {
    console.log('operator', target.value);
    return;
  }

  if (target.classList.contains('decimal')) {
    console.log('decimal', target.value);
    return;
  }

  if (target.classList.contains('all-clear')) {
    console.log('clear', target.value);
    return;
  }

  console.log('digit', target.value);
});
In the above snippet, we’re listening for a click event on the element with a
class of calculator-keys. Since all the keys on the calculator are children
of this element, the click event filters down to them too. This is known as
event delegation.
Inside the callback function of the event listener, we extract the target
property of the click event using destructuring
assignment
which makes it easy to unpack object properties into distinct variables.
const { target } = event;
// is equivalent to
const target = event.target;
The target variable is an object that represents the element that was clicked.
If this element is not a button (such as if you click the spaces between the
buttons), we will exit the function by returning early. Otherwise, the type of
button that was clicked is logged to the console along with its value.
Be sure to try this out before proceeding to the next step. Open up your browser console and click any of the buttons. The key’s type and value should be logged to the console accordingly.
The correct type of key is detected and logged to the console
Input the digits
In this step, we’ll make the digit buttons work so that when any of them is clicked, the corresponding value is displayed on the screen.
Since the displayValue property of the calculator object represents the
input of the user, we need to modify it when any of the digits is clicked.
Create a new function called inputDigit below the calculator object:
function inputDigit(digit) {
  const { displayValue } = calculator;
  // Overwrite `displayValue` if the current value is '0' otherwise append to it
  calculator.displayValue = displayValue === '0' ? digit : displayValue + digit;
}
Next, replace the following line in the click event listener callback function:
console.log('digit', target.value);with the following code:
inputDigit(target.value);
updateDisplay();
In the inputDigit function, the ternary
operator
(?) is used to check if the current value displayed on the calculator is zero.
If so, calculator.displayValue is overwritten with whatever digit was clicked.
Otherwise, if displayValue is a non-zero number, the digit is appended to it
through string concatenation.
Finally, the updateDisplay() function is invoked so that the new contents of
the displayValue property is reflected on the screen after each button is
clicked. Try it out by clicking any of the digit buttons. The display should be
updated with whatever digit you clicked.
Input a decimal point
When the decimal point key is clicked, we need to append a decimal point to whatever is displayed on the screen except if it already contains a decimal point.

Here’s how we can achieve that. Create a new function called inputDecimal
below inputDigit:
function inputDecimal(dot) {
  // If the `displayValue` property does not contain a decimal point
  if (!calculator.displayValue.includes(dot)) {
    // Append the decimal point
    calculator.displayValue += dot;
  }
}
Within the inputDecimal function, the
includes()
method is used to check if displayValue does not already contain a decimal
point. If so, a dot is appended to the number. Otherwise, the function exits.
Following that, replace the following line in the keys’ event listener callback function:
console.log('decimal', target.value);with the following lines of code:
inputDecimal(target.value);
updateDisplay();
At this point, you should be able to add input a decimal point successfully and have it display on the screen.
Handling operators
The next step is to get the operators (+, −, ⨉, ÷, =) on the calculator working. There are three scenarios to account for:
1. When a user hits an operator after entering the first operand
At this point, the contents of displayValue should be stored under the
firstOperand property and the operator property should be updated with
whatever operator was clicked.
Create a new function called handleOperator below inputDecimal:
function handleOperator(nextOperator) {
  // Destructure the properties on the calculator object
  const { firstOperand, displayValue, operator } = calculator
  // `parseFloat` converts the string contents of `displayValue`
  // to a floating-point number
  const inputValue = parseFloat(displayValue);

  // verify that `firstOperand` is null and that the `inputValue`
  // is not a `NaN` value
  if (firstOperand === null && !isNaN(inputValue)) {
    // Update the firstOperand property
    calculator.firstOperand = inputValue;
  }

  calculator.waitingForSecondOperand = true;
  calculator.operator = nextOperator;
}
When an operator key is pressed, the contents of displayValue is converted to
a floating-point number (meaning a number with a decimal point) and the result
is stored in the firstOperand property.
The operator property is also set to whatever operator key was clicked while
waitingForSecondOperand is set to true which indicates that the first
operand has been entered and whatever digits the user enters next will
constitute the second operand.
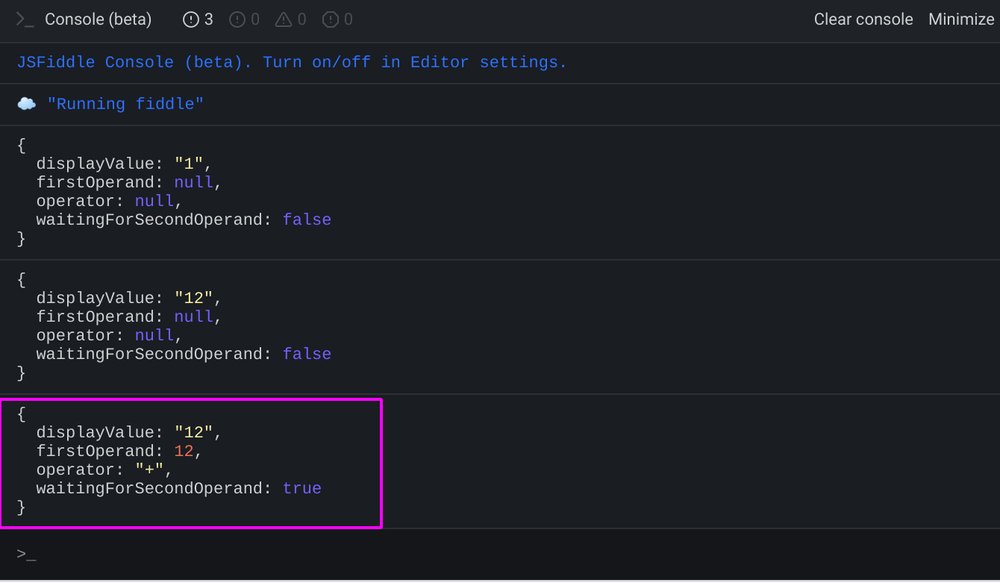
At this point, it is useful to see how the properties of the calculator object
are being updated on each button press. Add the following line to the end of
both the inputDigit and handleOperator functions:
console.log(calculator);Then replace the following line in the keys’ click event listener callback
function:
console.log('operator', target.value);with the following code:
handleOperator(target.value);
updateDisplay();
At this point, try to construct a valid arithmetic operation by clicking the
following keys in turn: 12 +. Notice that when the + key is pressed, the
values of firstOperand and operator properties are updated to 12 and +
respectively while waitingForSecondOperand is set to true indicating that the
calculator is now waiting for the second operand to be entered.
If you try to enter the second operand, you will notice that it is appended to the first instead of overwriting it.
Let’s fix that by updating the inputDigit function as shown below:
function inputDigit(digit) {
  const { displayValue, waitingForSecondOperand } = calculator;

  if (waitingForSecondOperand === true) {
    calculator.displayValue = digit;
    calculator.waitingForSecondOperand = false;
  } else {
    calculator.displayValue = displayValue === '0' ? digit : displayValue + digit;
  }

  console.log(calculator);
}
If the waitingForSecondOperand property is set to true, the displayValue
property is overwritten with the digit that was clicked. Otherwise, the same
check is performed as before, overwriting or appending to displayValue as
appropriate.
2. When the user hits an operator after entering the second operand
The second scenario we need to handle occurs when the user has entered the
second operand and an operator key is clicked. At that point, all the
ingredients to evaluate the expression is present so we need to do so and
display the result on the screen. The firstOperand also needs to be updated so
that the result can be reused in the next calculation.
Create a new function called calculate below handleOperator as shown below:
function calculate(firstOperand, secondOperand, operator) {
  if (operator === '+') {
    return firstOperand + secondOperand;
  } else if (operator === '-') {
    return firstOperand - secondOperand;
  } else if (operator === '*') {
    return firstOperand * secondOperand;
  } else if (operator === '/') {
    return firstOperand / secondOperand;
  }

  return secondOperand;
}
This function takes the first operand, second operand and operator as arguments
and checks the value of the operator to determine how the expression should be
evaluated. If the operator is =, the second operand will be returned as is.
Next, update the handleOperator function as shown below:
function handleOperator(nextOperator) {
  const { firstOperand, displayValue, operator } = calculator
  const inputValue = parseFloat(displayValue);

  if (firstOperand == null && !isNaN(inputValue)) {
    calculator.firstOperand = inputValue;
  } else if (operator) {
    const result = calculate(firstOperand, inputValue, operator);

    calculator.displayValue = String(result);
    calculator.firstOperand = result;
  }

  calculator.waitingForSecondOperand = true;
  calculator.operator = nextOperator;
  console.log(calculator);
}
The else if block added to handleOperator checks if the operator property
has been assigned an operator. If so, the calculate function is invoked and
the result is saved in the result variable.
This result is subsequently displayed to the user by updating the displayValue
property. Also, the value of firstOperand is updated to the result so that it
may be used in the next calculator.
Try it out. Enter 12 + 10 = in the calculator and notice that the correct
result is displayed on the screen. It also works when you chain a string of
operations. So 5 * 20 - 14 = should give 86 as the result.

This is because hitting the minus key triggers the calculation of the first
operation (5 * 20) whose result (100) is subsequently set as the
firstOperand for the next calculation so by the time we enter 14 as the
second operand and hit the = key, the calculate function is executed again
giving 86 as the result which is also set as the firstOperand for the next
operation, and so on.
3. When two or more operators are entered consecutively
It’s quite common to change one’s mind about the type of operation one wants to perform so the calculator must handle this properly.
Let’s say you want to add seven and two together, you will click 7 + 2 = which
will produce the correct result. But let’s assume after hitting 7 +, you
change your mind and decide to subtract 2 from 7. Instead of clearing the
calculator and starting all over, you should be able to hit - to override the
+ that was previously entered.
Remember that at the point the operator is entered, waitingForSecondOperand
will be set to true since the calculator expects a second operand to be
entered after the operator key. We can use this quality to update the operator
key and prevent any calculations until the second operand has been inputted.
Modify the handleOperator function to look like this:
function handleOperator(nextOperator) {
  const { firstOperand, displayValue, operator } = calculator
  const inputValue = parseFloat(displayValue);

  if (operator && calculator.waitingForSecondOperand)  {
    calculator.operator = nextOperator;
    console.log(calculator);
    return;
  }

  if (firstOperand == null && !isNaN(inputValue)) {
    calculator.firstOperand = inputValue;
  } else if (operator) {
    const result = calculate(firstOperand, inputValue, operator);
    calculator.displayValue = String(result);
    calculator.firstOperand = result;
  }

  calculator.waitingForSecondOperand = true;
  calculator.operator = nextOperator;
  console.log(calculator);
}
The relevant change is highlighted above. The if statement checks if an
operator already exists and if waitingForSecondOperand is set to true. If
so, the value of the operator property is replaced with the new operator and
the function exits so that no calculations are performed.
Try it out. Click multiple operators after entering some digits and monitor the
calculator object in the console. Notice that the operator property is updated
each time and no calculations are performed until you provide the second
operand.
Reset the calculator
The final task is to make sure the user can reset the calculator to its initial
state by pressing a key. In most calculators, the AC button is used to reset
the calculator to its default state, so that’s what we’re going to do here.
Go ahead and create a new function below calculate as shown below:
function resetCalculator() {
  calculator.displayValue = '0';
  calculator.firstOperand = null;
  calculator.waitingForSecondOperand = false;
  calculator.operator = null;
  console.log(calculator);
}
Then replace the following line in the keys’ event listener callback function:
console.log('all clear', target.value)with the following code:
resetCalculator();
updateDisplay();
The resetCalculator function sets all the properties of the calculator
object to their original values. Clicking the AC key on the calculator should
now work as expected. You can check the calculator object in the console to
confirm.
Fix decimal bug
If you enter a decimal point after clicking on an operator, it gets appended to the first operand instead of being a part of the second.
We can fix this bug by making the following modification to the inputDecimal
function:
function inputDecimal(dot) {
  if (calculator.waitingForSecondOperand === true) {
  	calculator.displayValue = '0.'
    calculator.waitingForSecondOperand = false;
    return
  }

  if (!calculator.displayValue.includes(dot)) {
    calculator.displayValue += dot;
  }
}
If waitingForSecondOperand is set to true and a decimal point is entered,
displayValue becomes 0. and waitingForSecondOperand is set to false so
that any additional digits are appended as part of the second operand.
The bug is now fixed
Refactor the event listener
Update the keys’ event listener as shown below. All the if blocks have
been replaced with a single switch block, and updateDisplay() is called only
once at the end of the function.
keys.addEventListener('click', event => {
  const { target } = event;
  const { value } = target;
  if (!target.matches('button')) {
    return;
  }

  switch (value) {
    case '+':
    case '-':
    case '*':
    case '/':
    case '=':
      handleOperator(value);
      break;
    case '.':
      inputDecimal(value);
      break;
    case 'all-clear':
      resetCalculator();
      break;
    default:
      // check if the key is an integer
      if (Number.isInteger(parseFloat(value))) {
        inputDigit(value);
      }
  }

  updateDisplay();
});
This way, it’s a lot easier to add new functions to the calculator and you no
longer need to invoke the updateDisplay() function after each operation.
Floating-point precision
I’d like to bring your attention to a problem that occurs when the result of an
operation is a floating number. For example, 0.1 + 0.2 produces
0.30000000000000004 instead of 0.3 as you’d probably expect.
In other cases, you get the expected result. 0.1 + 0.4 yields 0.5 for
example. A detailed explaination for why this happens can be found
here. Make sure you read it.
One of the potential solutions to this problem suggested in the above linked page is to format the result to a fixed number of decimal places so that the others are discarded. We can combine the JavaScript parseFloat function with the Number.toFixed method to implement this solution in our calculator app.
In the handleOperator function, replace the following line:
calculator.displayValue = String(result);with the following code:
calculator.displayValue = `${parseFloat(result.toFixed(7))}`;The toFixed() method accepts a value between 0 and 20, and ensures that the
number of digits after the decimal point is restricted to that value. The
return value may be rounded or padded with zeros if necessary.
In the earlier example, 0.1 + 0.2 yielded 0.30000000000000004. Using
toFixed(7) on the result will restrict the digits after the decimal point to
seven digits:
0.30000000000000004.toFixed(7) // 0.3000000
Those extra zeros are not important, so we can use parseFloat to get rid of
them:
parseFloat(0.30000000000000004.toFixed(7)) // 0.3
And that’s how we’re able to fix this problem in our application. I chose the number 7 in this case because it’s a good enough precision for this calculator app. A greater amount of precision may be required in other situations.
As an added bonus, the result now fits on the screen
Bonus content
I have prepared some further enhancements to this calculator app for my Patreon supporters. The following functions were added to the app: sin, cos, tan, log, square, square root, factorial, percent, plus/minus, π and ce.
Support me on Patreon to unlock the next section of this tutorial
If you’d like to gain access to all my bonus content (including this one), consider supporting Freshman on Patreon. Your support will help me create more tutorials at a faster rate.
Conclusion
That concludes my tutorial, I hope you learnt a lot from it. Feel free to leave a comment if a section of the article is not clear enough for you, and subscribe to my newsletter to get more awesome tutorials like this one in your inbox.
Thanks for reading, and happy coding!