How to build a Todo List App with JavaScript
Some people claim building a todo list app is a boring activity since so many exist already but I think it remains a great exercise for learning useful concepts that are widely applicable in many programming contexts.
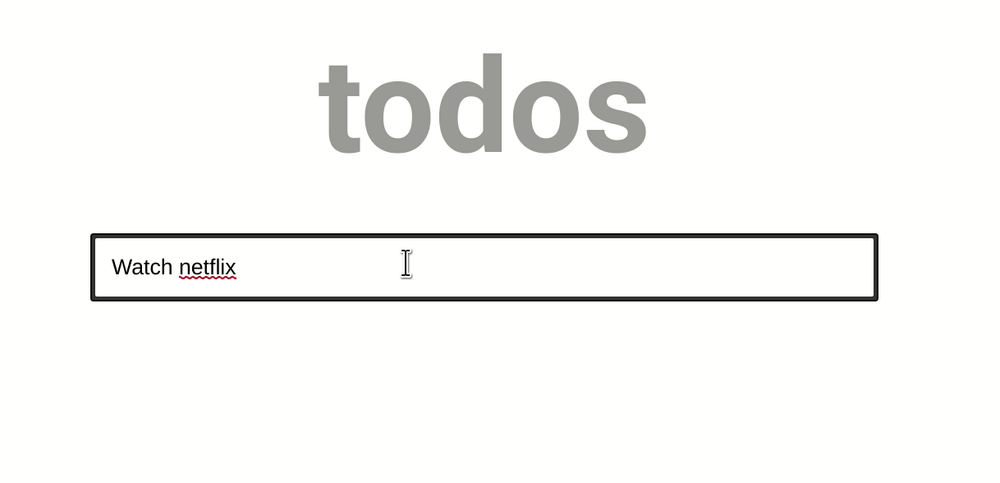
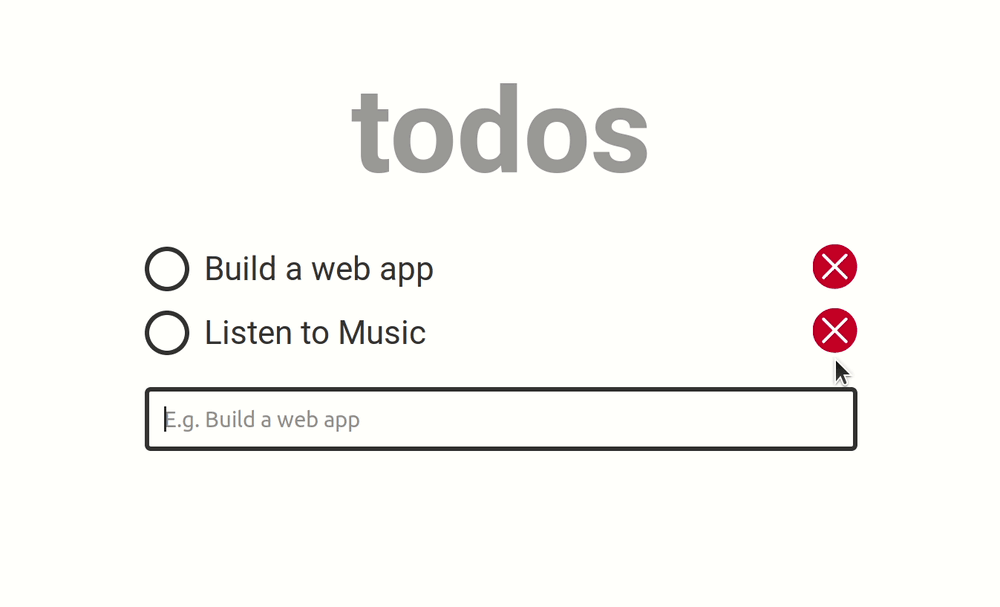
If you’re not completely turned off by the idea of building yet another todo list app, and you’re relatively new to JavaScript and Front-end development, this tutorial is for you. Here’s a live demo of what you’ll be building.
See the live demo.
Prerequisites
This tutorial assumes that you have a basic knowledge of JavaScript. Essentially, you need to know what variables, arrays, functions and objects are, but you do not need to have prior experience with building JavaScript applications.
Get started
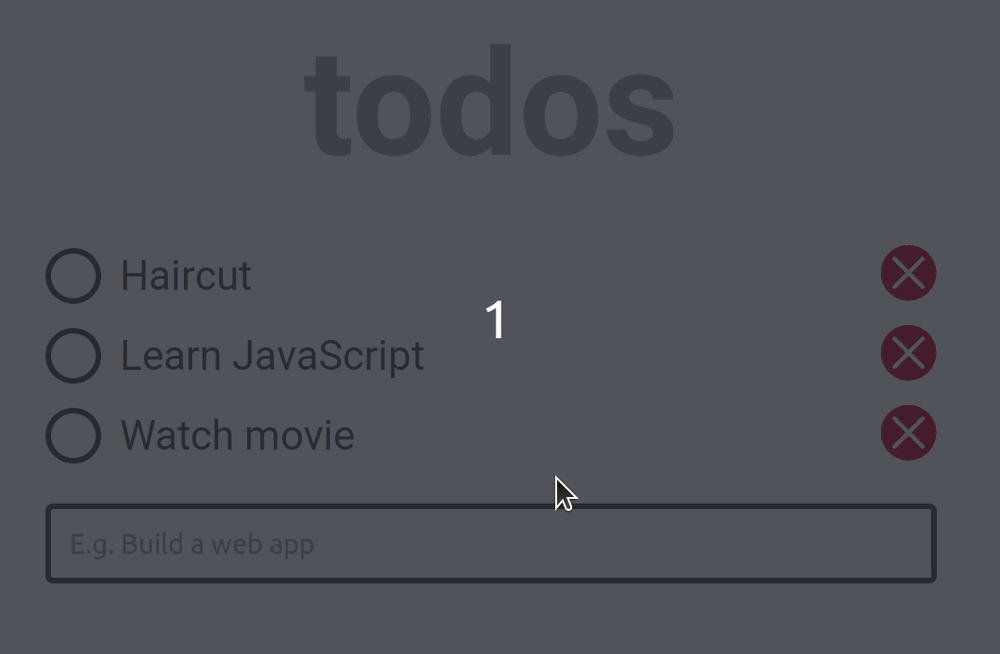
The todo list app we’ll build in this tutorial will be pretty basic. A user can add a task, mark a task as completed and delete an already added task. I’ll explain how to build each feature, but you must follow along by typing the code and running it on your end to get the most out of this tutorial.
I recommend using JSFiddle while working through this tutorial, but feel free to use other code playgrounds or your local text editor if you prefer. Without further ado, grab the markup and styles for the app on JSFiddle. If you’re using JSFiddle, you can hit the Fork button to create a new fiddle of your own.
Add a todo
The first thing we need to do is set up an array where we’ll place the todo list
items. Each todo item will be an object with three properties: text, a string
which holds whatever the user types into the text input, checked, a boolean
which helps us know if a task has been marked completed or not, and id, a
unique identifier for the item.
Once a new task is added, we’ll create a new todo object, push it into the
array and render the value of the text property on the screen. When a todo is
marked as completed, we’ll toggle the checked property to true, and when the
user deletes a todo, we’ll locate the todo item in the array using its id and
remove it.
Let’s start by adding a todo item to our list. To do so, we need to listen for
the submit event on the form element, and then invoke a new addTodo()
function when the form is submitted.
Update the JavaScript pane on JSFiddle to look like this:
// This is the array that will hold the todo list items
let todoItems = [];

// This function will create a new todo object based on the
// text that was entered in the text input, and push it into
// the `todoItems` array
function addTodo(text) {
  const todo = {
    text,
    checked: false,
    id: Date.now(),
  };

  todoItems.push(todo);
  console.log(todoItems);
}

// Select the form element
const form = document.querySelector('.js-form');
// Add a submit event listener
form.addEventListener('submit', event => {
  // prevent page refresh on form submission
  event.preventDefault();
  // select the text input
  const input = document.querySelector('.js-todo-input');

  // Get the value of the input and remove whitespace
  const text = input.value.trim();
  if (text !== '') {
    addTodo(text);
    input.value = '';
    input.focus();
  }
});
By default, when a form is submitted, the browser will attempt to submit it to a
server which will cause a page refresh. To prevent that from happening, we can
stop the default behaviour by listening for the submit event on the form, and
using event.preventDefault().
Next, we select the text input and
trim
its value to remove whitespace from the beginning and end of the string, and
then save it in a new variable called text. If the text variable is not
equal to an empty string, we pass the text to the addTodo() function which is
defined above the event listener.
const todo = {
  text,
  checked: false,
  id: Date.now(),
};
Within the function, we create a new object for the task and add the properties
I mentioned earlier. The text property is set to the function argument,
checked is initialised to false, and id is initialised to the number of
milliseconds elapsed since January 1, 1970. This id will be unique for each
todo item unless you can add more than one task in a millisecond, which I don’t
think is possible.
todoItems.push(todo);
console.log(todoItems);
Finally, the task is pushed to the todoItems array, and the array is logged to
the console. In the form event listener after addTodo(text), the value of the
text input is cleared by setting it to an empty string, and it’s also focused so
that the user can add multiple items to the list without having to focus the
input over and over again.
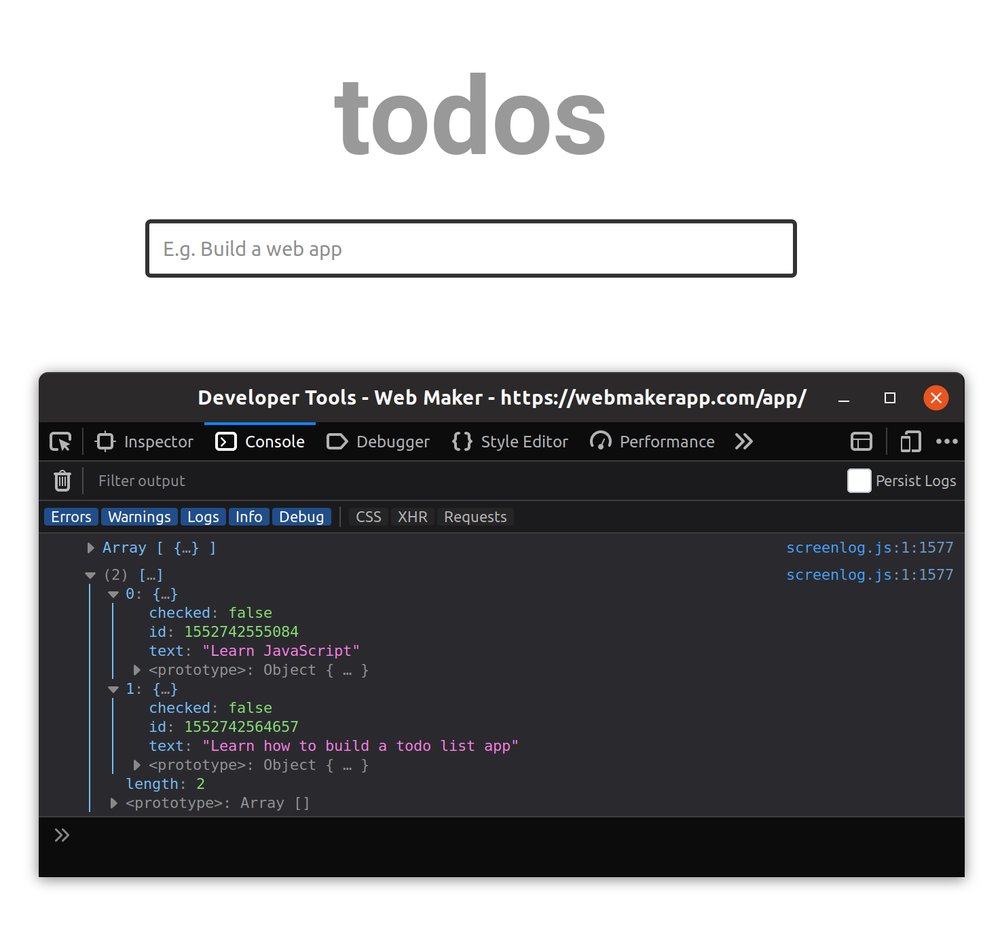
Add a few todo items and view the todoItems array in your browser console. You
will see that each todo item is represented by an object in the array. If you’re
using JSFiddle, you may need to check the built-in console provided by JSFiddle.
Render the todo items
Once a new todo item is added to the todoItems array, we want the app to be
updated with the item rendered on the screen. We can do this pretty easily by
appending a new li element for each item to the .js-todo-list element in the
DOM.
To achieve this, add a new renderTodo() function above addTodo():
function renderTodo(todo) {
  // Select the first element with a class of `js-todo-list`
  const list = document.querySelector('.js-todo-list');

  // Use the ternary operator to check if `todo.checked` is true
  // if so, assign 'done' to `isChecked`. Otherwise, assign an empty string
  const isChecked = todo.checked ? 'done': '';
  // Create an `li` element and assign it to `node`
  const node = document.createElement("li");
  // Set the class attribute
  node.setAttribute('class', `todo-item ${isChecked}`);
  // Set the data-key attribute to the id of the todo
  node.setAttribute('data-key', todo.id);
  // Set the contents of the `li` element created above
  node.innerHTML = `
    <input id="${todo.id}" type="checkbox"/>
    <label for="${todo.id}" class="tick js-tick"></label>
    <span>${todo.text}</span>
    <button class="delete-todo js-delete-todo">
    <svg><use href="#delete-icon"></use></svg>
    </button>
  `;

  // Append the element to the DOM as the last child of
  // the element referenced by the `list` variable
  list.append(node);
}
The renderTodo() function takes a todo object as its only parameter. It
constructs a li DOM node using the
document.createElement method. On the next line, the class attribute is set
to todo-item ${isChecked}. The value of isChecked will be an empty string if
the checked property in the todo object is false. Otherwise, it will be
‘done’. You will see the effect of this ‘done’ class in the next section.
Next, a data-key attribute is also set on the li element. It is set to
the id property of the todo object and will be used to locate a specific
todo item in the DOM later in the tutorial. Following
that, the contents of the li element are set using the innerHTML method and
finally, the li element is inserted as the last child of the .js-todo-list
element.
Change the console.log(todoItems) line in addTodo() to renderTodo(todo) as
shown below so that the renderTodo() function is invoked each time a new todo
item is added.
function addTodo(text) {
  const todo = {
    text,
    checked: false,
    id: Date.now(),
  };

  todoItems.push(todo);
  renderTodo(todo);
}
Try it out by adding a few todo items. They should all render on the page.
Mark a task as completed
Let’s add the ability to mark a task as completed. To do so, we need to listen
for the click event on the checkbox and toggle the checked property on
the corresponding todo item.
Add the following code at the bottom of the JavaScript pane to detect the todo item that is being checked off:
// Select the entire list
const list = document.querySelector('.js-todo-list');
// Add a click event listener to the list and its children
list.addEventListener('click', event => {
  if (event.target.classList.contains('js-tick')) {
    const itemKey = event.target.parentElement.dataset.key;
    toggleDone(itemKey);
  }
});
Instead of listening for clicks on individual checkbox elements, we are
listening for clicks on the entire list container. When a click event occurs on
the list, a check is done to ensure that the element that was clicked is a
checkbox. If so, the value of data-key on the checkbox’s parent element is
extracted and passed to a new toggleDone() function (shown below) which should
be placed below the addTodo() function.
function toggleDone(key) {
  // findIndex is an array method that returns the position of an element
  // in the array.
  const index = todoItems.findIndex(item => item.id === Number(key));
  // Locate the todo item in the todoItems array and set its checked
  // property to the opposite. That means, `true` will become `false` and vice
  // versa.
  todoItems[index].checked = !todoItems[index].checked;
  renderTodo(todoItems[index]);
}
This function receives the key of the list item that was checked or unchecked
and finds the corresponding entry in the todoItems array using the
findIndex
method. Once we have the index of the todo item, we need to locate it in the
todoItems array using bracket notation. The value of the checked property on
the todo item is then set to the opposite value.
Finally, the renderTodo() function is called with the todo object passed in.
If you run the code now and try checking off an item, it will duplicate the todo
item instead of checking off the existing one.
To fix this, we need to check if the current todo item exists in the DOM first, and replace it with the updated node if it does.
Change your renderTodo() function as shown below:
function renderTodo(todo) {
  const list = document.querySelector('.js-todo-list');
  // select the current todo item in the DOM
  const item = document.querySelector(`[data-key='${todo.id}']`);

  const isChecked = todo.checked ? 'done': '';
  const node = document.createElement("li");
  node.setAttribute('class', `todo-item ${isChecked}`);
  node.setAttribute('data-key', todo.id);
  node.innerHTML = `
    <input id="${todo.id}" type="checkbox"/>
    <label for="${todo.id}" class="tick js-tick"></label>
    <span>${todo.text}</span>
    <button class="delete-todo js-delete-todo">
    <svg><use href="#delete-icon"></use></svg>
    </button>
  `;

  // If the item already exists in the DOM
  if (item) {
    // replace it
    list.replaceChild(node, item);
  } else {
    // otherwise append it to the end of the list
    list.append(node);
  }
}
First, the current todo item is selected. If it exists in the DOM, the element will be returned and subsequently replaced. If the item does not exist (as is the case for new todo items), it will be added at the end of the list.
Delete todo items
Similar to the way we implemented the last feature, we’ll listen for clicks on
the .js-delete-todo element, then grab the key of the parent and pass it off
to a new deleteTodo function which will remove the corresponding todo object
in todoItems array send the todo item to renderTodo() to be removed from the
DOM.
First, let’s detect when the delete button is clicked:
const list = document.querySelector('.js-todo-list');
list.addEventListener('click', event => {
  if (event.target.classList.contains('js-tick')) {
    const itemKey = event.target.parentElement.dataset.key;
    toggleDone(itemKey);
  }

  // add this `if` block
  if (event.target.classList.contains('js-delete-todo')) {
    const itemKey = event.target.parentElement.dataset.key;
    deleteTodo(itemKey);
  }
});
Next, create the deleteTodo() function below toggleDone() as shown below:
function deleteTodo(key) {
  // find the corresponding todo object in the todoItems array
  const index = todoItems.findIndex(item => item.id === Number(key));
  // Create a new object with properties of the current todo item
  // and a `deleted` property which is set to true
  const todo = {
    deleted: true,
    ...todoItems[index]
  };
  // remove the todo item from the array by filtering it out
  todoItems = todoItems.filter(item => item.id !== Number(key));
  renderTodo(todo);
}
The renderTodo() function also needs to be updated as follows:
function renderTodo(todo) {
const list = document.querySelector('.js-todo-list');
const item = document.querySelector(`[data-key='${todo.id}']`);
// add this if block
if (todo.deleted) {
// remove the item from the DOM
item.remove();
return
}
const isChecked = todo.checked ? 'done': '';
const node = document.createElement("li");
node.setAttribute('class', `todo-item ${isChecked}`);
node.setAttribute('data-key', todo.id);
node.innerHTML = `
<input id="${todo.id}" type="checkbox"/>
<label for="${todo.id}" class="tick js-tick"></label>
<span>${todo.text}</span>
<button class="delete-todo js-delete-todo">
<svg><use href="#delete-icon"></use></svg>
</button>
`;
if (item) {
list.replaceChild(node, item);
} else {
list.append(node);
}
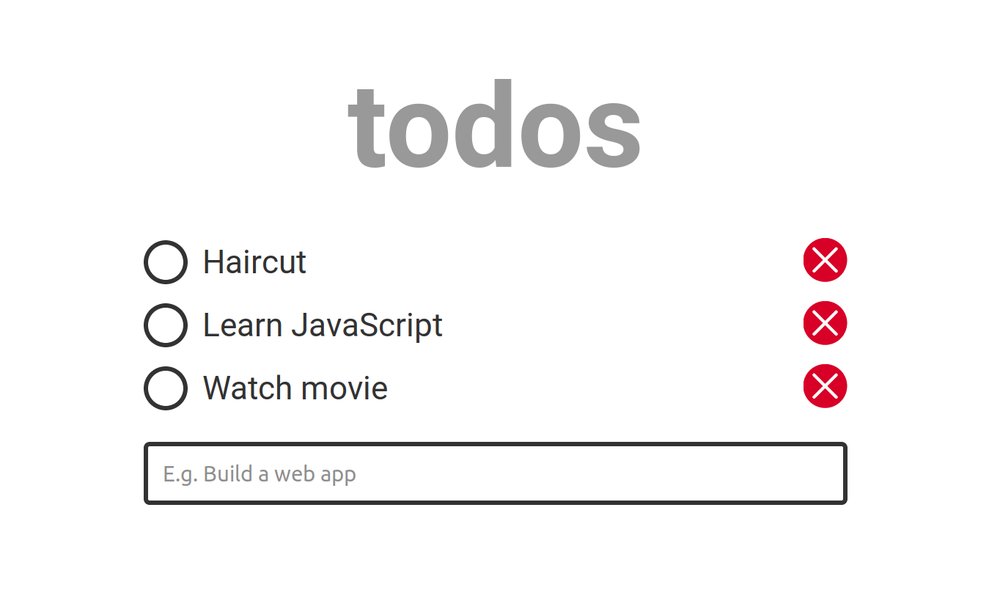
}Now, you should be able to delete tasks by clicking the delete button.
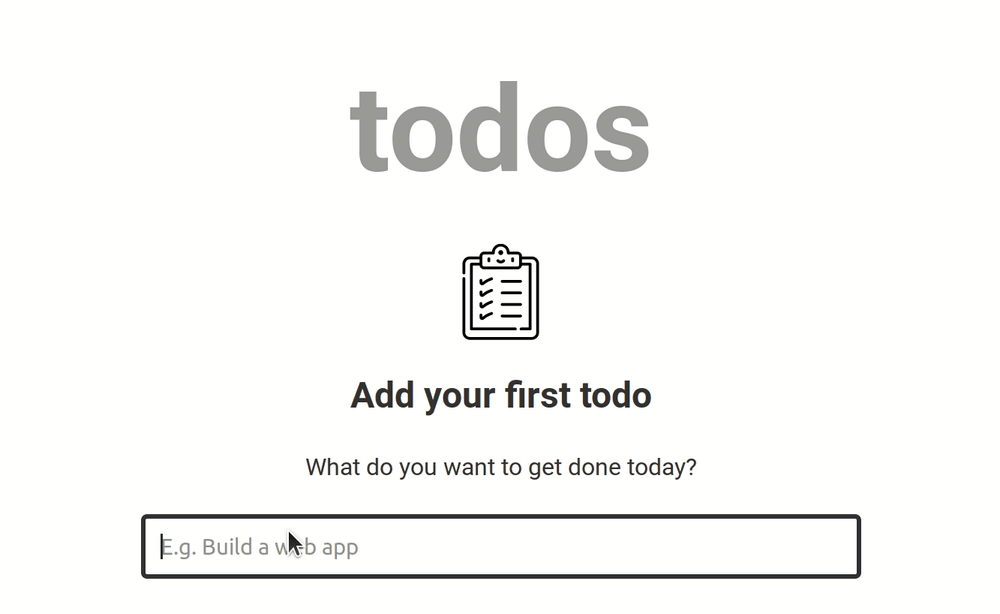
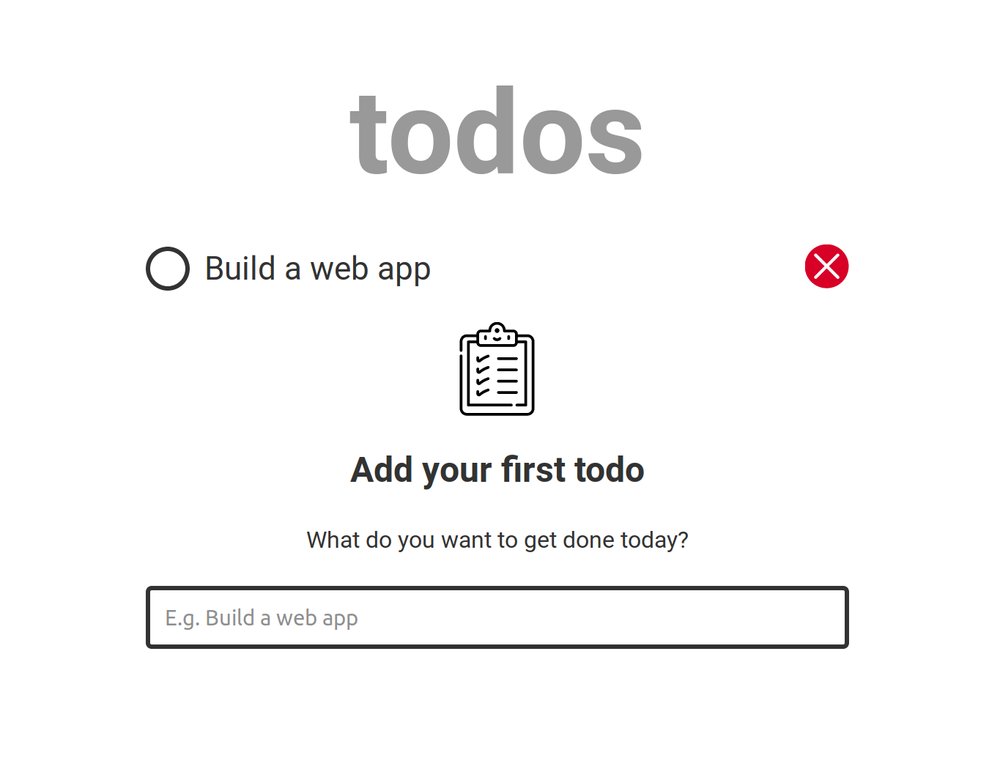
Add an empty state prompt
An empty state occurs when there is no data to show in the app. For example, when the user hasn’t added a todo yet (first use) or when the user has cleared the list. It is important to account for this state when designing an application.
Many apps use the empty state to show a prompt that tells the user what to do. Here is a real-world example of what a good empty state prompt looks like:
Once there are no tasks to display, we’ll add a prompt that encourages the user to add a new task. This feature can be implemented with just HTML and CSS.
We will take advantage of the :empty CSS selector to
display the prompt conditionally only if no items exist in the list.
Add the following code for the empty state prompt in the HTML pane as shown below:
<main>
  <div class="container">
    <h1 class="app-title">todos</h1>
    <ul class="todo-list js-todo-list"></ul>
    <!-- add the empty state here -->
    <div class="empty-state">
      <svg class="checklist-icon"><use href="#checklist-icon"></use></svg>
      <h2 class="empty-state__title">Add your first todo</h2>
      <p class="empty-state__description">What do you want to get done today?</p>
    </div>
    <!-- end -->
    <form class="todo-form js-form">
      <input autofocus type="text" aria-label="Enter a new todo item" placeholder="E.g. Build a web app" class="js-todo-input">
    </form>
  </div>
</main>
<!-- rest of the code -->
Then add some styles for the empty state in your CSS:
/* Add this below all the other styles */

.empty-state {
  flex-direction: column;
  align-items: center;
  justify-content: center;
  display: flex;
}

.checklist-icon {
  margin-bottom: 20px;
}

.empty-state__title, .empty-state__description {
  margin-bottom: 20px;
}
While this looks just fine, the problem is that the message persists even when a task has been added to the list. The intended behaviour is for the prompt to disappear once a todo has been added and only reappear when there are no more tasks to display.
This bit of CSS will give us what we want:
/* Change `display: flex` to `display: none` */
.empty-state {
  flex-direction: column;
  align-items: center;
  justify-content: center;
  display: none;
}

/* Add this below the other styles */
.todo-list:empty {
  display: none;
}

.todo-list:empty + .empty-state {
  display: flex;
}
The .empty-state element is hidden from view by default with display: none
and only comes into view when .todo-list is empty. We’re using the
:empty selector to
detect when .todo-list is empty, and the sibling selector (+) to target
.empty-state and apply display: flex to it only when .todo-list is empty.
A subtle bug
One issue I encountered while working on this tutorial is that the empty state wouldn’t return into view when all existing tasks are deleted.
Apparently, some whitespace persists in the .todo-list element even after all
its child li elements have been removed, so it’s not considered to be empty
and the styles defined with the :empty selector does not kick in. To fix this
issue, we need to clear any whitespace from the element in our JavaScript
code. Modify the renderTodo() function as follows:
if (todo.deleted) {
  item.remove();
  // add this line to clear whitespace from the list container
  // when `todoItems` is empty
  if (todoItems.length === 0) list.innerHTML = '';
  return
}
The above code solves the problem, and the app now works as expected.
Persist the application state
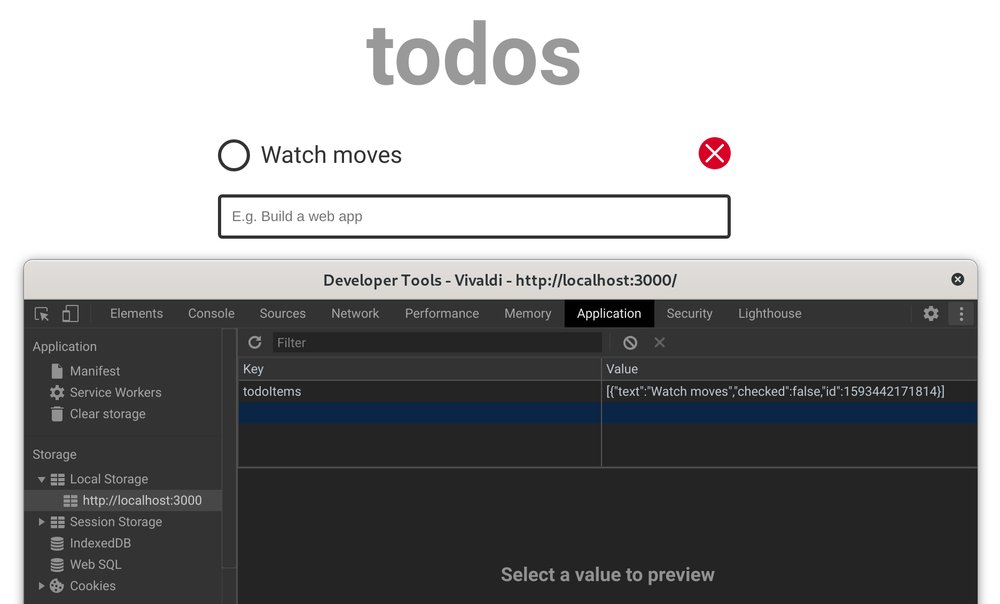
Our todo list app is pretty much complete at this point, but let’s add one more feature to make things a bit more interesting and realistic. At the moment, once the page is refreshed, all the todo items are cleared. Let’s prevent this by persisting the application state to the browser’s localstorage.
Add this line at the top of your renderTodo() function:
localStorage.setItem('todoItemsRef', JSON.stringify(todoItems));Only strings may be stored in the localStorage so we need to convert our
todoItems array to a JSON string first before passing it to the setItem
method which adds a new data item under the specified key.
Each time the renderTodo() function is invoked, the value of todoItemsRef in
the localStorage will be replaced with the current value of the todoItems
array. This way, the array and the corresponding localStorage reference is kept
in sync.
You can test this out by opening your browser dev tools, navigate to the Application tab and monitor the Local Storage section. If you’re not using Chrome, the dev tools may be organised differently.
The final step is to render any existing todo list items when the page is loaded. Add the following code snippet at the bottom of the JavaScript pane:
document.addEventListener('DOMContentLoaded', () => {
  const ref = localStorage.getItem('todoItemsRef');
  if (ref) {
    todoItems = JSON.parse(ref);
    todoItems.forEach(t => {
      renderTodo(t);
    });
  }
});
When the DOMContentLoaded event is fired, we proceed to retrieve the value of
todoItemsRef from the localStorage. If it exists, the JSON.parse method is
used to convert the JSON string back to its original array form and save it in
todoItems.
Following that, renderTodo() is invoked for each todo object present in the
array. This causes any saved todo items to be rendered as soon as the page
loads.
Conclusion
In this tutorial, we successfully built a todo list app that allows a
user to add new tasks, mark a task as completed and delete old ones. We also
discussed the importance of accounting for empty states when designing an
application, then proceeded to talk about a potential problem when using the
:empty selector and how to fix it.
Finally, we discussed persisting the application state to the browser’s
localStorage and how to get around its limitations using JSON.stringify and
JSON.parse. If a section or piece of code is not clear to you, feel free to
leave a comment below and I’ll get back to you as soon as possible.
Thanks for reading, and happy coding!