How to process file uploads in Go
This article will teach you how you can upload single or multiple files to a Golang web server, and show progress reporting on file uploads
Since its first release in 2009, Go (also known as Golang) has continuously increased in popularity and has been adopted by big and small companies alike mostly in place of dynamic environments such as Python, Ruby, and Node.js. The language has a lot to offer and is well worth learning in 2020 and beyond.
Go is an imperative, statically typed, compiled programming language first developed at Google by Rob Pike, Robert Griesemer, and Ken Thompson in 2007 and open sourced in 2009. It was developed as a reaction to the perceived shortcomings of existing languages and environments which made developing large software systems to be slow and clumsy.
At the time when Go was first designed, Java and C++ were the most commonly used languages for writing servers at Google and these languages had not evolved properly to take full advantage of modern hardware advancements.
Slow build times, uncontrolled dependencies, poor documentation, and an inability to effectively use hardware resources were some of the other problems that were associated with those languages at the time. Another major concern was the growing complexity that made the maintenance of systems developed in those languages to be tedious and inefficient.
Due to these issues, some people were beginning to adopt dynamic languages like Ruby and Python for their server side projects. These languages required no compilation time which was a boon for productivity, but they lacked the performance characteristics and type safety of statically typed languages which often caused hard to track bugs.
Go was designed to provide the best of both worlds: a statically typed, fast to compile, and fast to execute language that remained easy to reason about even at the scale of a really large software project.
The authors of Go originally envisaged it as alternative to the likes of C++, but that’s not really how it has been adopted over the years. Go is mostly used in places where companies would normally opt for Python, Node.js or Java. In particular, Go is great for:
If your use case falls into one of the above categories, it’s likely that Go would be a great option for you to consider. To give you a sense of the how Go is being used in the real world, here’s a few examples:
As mentioned earlier, Go provides many of the benefits of programming in a dynamic language without any of the downsides. It’s designed to be simple and easy to reason about, so it omits a lot of the crazy programming syntax and features that are present in other mainstream languages. This makes it relatively easy to learn and teach others.
It also features speedy compilation times and exceptional performance that blows past dynamic languages like Python or Ruby although it’s generally slower than C++ or Rust. But then again, Go was not designed to function as “low” as either language.
Go’s “batteries included” standard library is often lauded as one of its best features. It is extensive, cross platform, well documented and provides everything you need to build networking services or CLI tools without pulling in any third-party packages. Common use cases like string manipulation, file and network I/O, testing, templating, JSON and so much more are well catered for by the standard library.
The language is also really stable with a strict compatibility promise that guarantees that any Go 1.x program will run unchanged on later 1.x versions of the language. For instance, a program that runs under Go 1.13 should be compatible with Go 1.14, Go 1.15, and so on without modification.
Deploying Go programs is a piece of cake as you don’t need to install a runtime
or go through any convoluted steps. The go build command will compile your
program into a single binary that you can deploy to your desired platform. You
can even build Go binaries that target
operating systems and architectures other than your own by customising some
environmental variables.
Demand for Go developers is also on the rise as more companies adopt the language for their cloud services and tooling. For example, Hired found Go to be the most in-demand language on their platform in 2019. Go developers also command a high salary, second only to Scala in the United States according to StackOverflow’s 2020 survey.

Concurrency is another strong point for Go. It provides lightweight but powerful concurrency features (goroutines and channels) that ensures your software will be able to effectively use the resources of the hardware it runs on. Go also has a garbage collector that is optimised for low latency so you don’t have to manage your own memory.
If you just want to play around with Go without committing, you can use the Go playground to get a feel for its syntax, and to write simple programs. However, if you’re serious about learning Go, you need to install it on your computer first.
The Go team provides pre-built binaries for Window, macOS and Linux. The option to install from source is also available if you use a different operating system from the aforementioned trio.
You have a few options to install Go on a Linux machine. If you have Snaps installed on your computer already, you can get the latest version of Go by running the command below.
$ sudo snap install go --classicOtherwise, you can check if your preferred distribution packages Go in its repositories. For example, Arch users can use the command below to install Go:
$ sudo pacman -S goThe main caveat with the above method is that you may not always get the latest version, especially if your distro does not follow a rolling release schedule.
The guaranteed way to get the latest version of Go is to download the Go
distribution archive for Linux and extract it to the
/usr/local/ directory:
$ sudo tar -C /usr/local -xzf go$VERSION.$OS-$ARCH.tar.gzEnsure to add /usr/local/go/bin to your PATH after using this method to
install Go. You can do this by adding the line below to your ~/.profile or
~/.bash_profile file.
export PATH=$PATH:/usr/local/go/binYou may need to run source ~/.profile or source ~/.bash_profile to apply
your changes immediately before the go command becomes available to use.
The easiest way to install Go on macOS is by using Homebrew:
$ brew install goAlternatively, you can download the package file, and follow the prompts to install the Go tools.
Download the MSI installer, open it and follow the on
screen instructions to install Go on your machine. By default, the Go tools will
be installed in C:\Go.
To check whether you have Go installed correctly, open a terminal and enter the command below:
$ go versionIt should output the version of Go you have installed as well as your system architecture. This is the output it printed on my machine for example:
go version go1.14.1 linux/amd64If you don’t see this information, and you’re on Windows, check that Go is in
your PATH system variable. Definitely make sure to troubleshoot your
installation and get it working before proceeding.
Go programs are written in simple UTF-8 text files with the .go extension so
you can use any code editor to program in Go. However, I recommend using
VSCode as it has strong Go support with the
help of the
vscode-go
plugin.
Once you install the plugin, it will provide formatting and intelligent code completion for you. Make sure to leave the formatting on, and respect the formatting rules it uses by default even if you have your own preferences.
The reason for this is that the idiomatic way to format all Go code is by using
the gofmt tool which the vscode-go plugin
leverages by default. Straying away from the rules used by gofmt is frowned
upon in the Go community.
Now that you’ve installed Go and set up your editor, you can proceed to write your first Go program. Traditionally, the first program you write when learning a new language will be one that prints the text “Hello, world!” to the screen, so we’ll do the same here.
The first step is to create a new directory to store your Go code. In the past,
it was compulsory to create your Go projects inside your GOPATH which is an
environmental variable that determines where Go should read and download all the
source files it will use for compiling your project. The GOPATH is assumed to
be $HOME/go on Unix systems and %USERPROFILE%\go on Windows by default,
although you can change it to some other directory.
As of Go v1.11, this is no longer necessary due to the introduction of Go modules which we’ll discuss shortly. You can now create your Go projects anywhere on your filesystem and it won’t matter to the Go compiler.
You can create a directory for your project and change into it using the commands below:
$ mkdir hello-world
$ cd hello-worldCreate a new main.go file inside your project directory and open it up in your
text editor. Enter the code below into the file and save it.
package main

import "fmt"

func main() {
	fmt.Println("Hello, world!")
}
Head over to your terminal window and enter the following command to compile the program:
$ go build main.goThis will produce a main binary file in your project directory. To run the
program, enter ./main in the terminal. It should print the text Hello, world! to your screen. If it did, congratulations! You are now officially part
of the Go community.

Let’s review the above program in detail so you can understand it better. Here’s the first line:
package mainEvery Go source file belongs to a package. A package is nothing more than a
directory containing one or more source files or other Go packages. To declare a
file as part of a package, we use the package <packagename> syntax which must
be the first line in the file.
The main package is special in Go. It indicates that the program should
produce an executable binary, and also serves as the entry point for every
executable Go program.
Inside the main package, a special main function must be declared that takes
no arguments and returns no value. This function will be invoked automatically
when the program runs.
func main() {

}
The above code defines a function in Go. The func keyword is used to create a
new function with a name (main in this case) and any parameters within the
parenthesis. The function body is also wrapped in curly braces {}. Go requires
that the opening curly brace must be on the same line as the function
declaration, otherwise the code will fail to compile.
Inside the main function, we have the following code:
fmt.Println("Hello World!")The fmt package comes from Go’s standard library,
and it exports several methods related to formatting and printing output or
reading input from various sources. The Println method for example, outputs
the provided string to the screen and adds a newline at the end.
Standard library packages are available to you after you install Go. They are included with your installation so you don’t need to download anything else afterwards
Before we can use methods from the fmt package, we need to bring it into
scope. That is what the following line is about:
import "fmt"Unlike dynamic languages such as JavaScript or Python, Go programs must be
compiled into a binary before they can be executed. The way you compile a Go
program is by using the go build command and passing it a source file or an
import path:
$ go build main.goIf compilation is successful, the command will not emit any output on the
screen. But you will discover that a binary executable (main) has been
produced in your project directory. This is what you need to execute to run the
program.
$ ./mainThere is another way to compile and run a Go program with a single command:
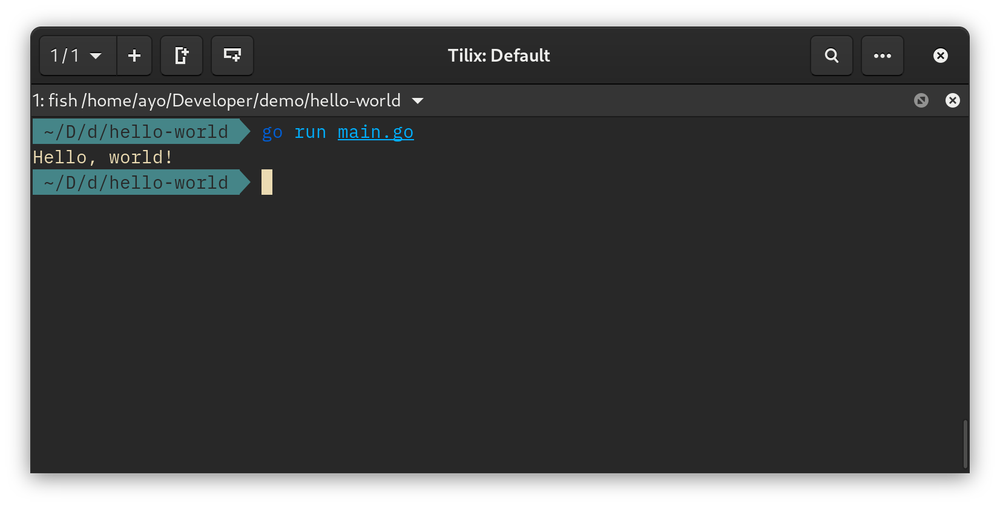
$ go run main.goThis will compile the program and run it immediately without producing a binary
in your project directory. Note that go run is really only meant to be used
for small programs, which generally need just a single file. For non-trivial
programs, using go build && ./<executable> is the recommend way to build and
run Go programs.

A module is a collection of related Go packages that are released together as
one entity. Typically, each Go project consists of a single module that lives at
the root of the project folder and is defined by a go.mod file. This file is
where the project’s module path is defined as well as any dependencies needed to
build the project.
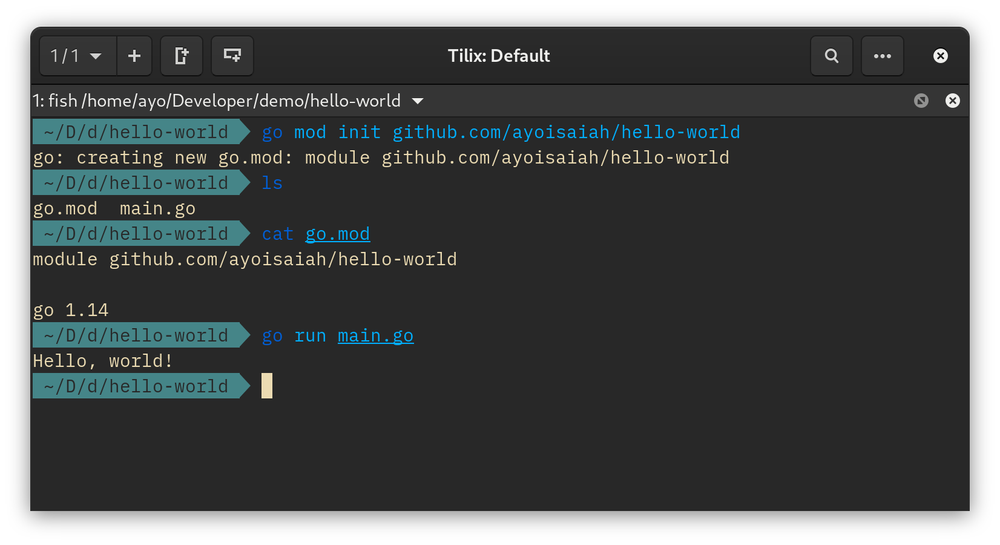
To create a new module, use the go mod init command at the root of your
project. You need to pass the import path of the project (usually the URL of
your project’s repository without the scheme). Even if you do not plan to
publish your code, it’s still a good habit to organise it as if you will do so
in the future.
$ go mod init github.com/ayoisaiah/hello-world
If you build and run your project, it should work just the same as before. The
difference is that including third-party dependencies in your project is now
possible because Go now knows how to track the dependency versions that your
module is using. Without initialising a go.mod file, any attempt to build a
project with third-party dependencies will fail with an error.
We’ll continue to explore some more features of Go modules in subsequent tutorials. However, if you’re keen to dig deeper, check out this series of posts on the subject on the official Go blog.
In this article, we discussed why Go was developed and what problems it solves. We also considered some of the common uses of the language and why you should learn it. Then we installed it and proceeded to write, build and execute our first program in the language.
The next tutorial will take you through a more interesting exercise of building a guessing game which will introduce you to several new concepts that should make you more comfortable with reading and writing Go code.
Thanks for reading, and happy coding!
Comments
Ground rules
Please keep your comments relevant to the topic, and respectful. I reserve the right to delete any comments that violate this rule. Feel free to request clarification, ask questions or submit feedback.