How to build a Pomodoro Timer App with JavaScript
Pomodoro is a time management technique developed in the 1980s which uses a timer to break down work into intervals, traditionally 25 minutes in length, separated by short breaks. In this tutorial, you’ll learn how to create such a timer in the browser with JavaScript.
A Pomodoro timer is a simple application that keeps you focused and productive by scheduling work and break sessions consecutively. Traditionally, you have 25-minute focus sessions followed by five-minute breaks and a longer 15-minute break after four consecutive focus sessions.
The Pomodoro timer we’ll be building in this tutorial implements the Pomodoro technique perfectly and tells you exactly when to work and when to take a short break. The basic process is as follows:
- Start a 25-minute timer.
- Work until the timer rings.
- Take a short, five minutes break.
- Every four pomodoros, take a longer break (15 minutes).
Checkout the live demo.
You can find a live demo of the completed application here.
Prerequisites
You need to have a basic knowledge of HTML, CSS and JavaScript under your belt. Additionally, you need to have Git, Node.js and npm installed on your computer.
Getting started
Grab the starter files for this tutorial on GitHub. It includes all the markup and styles for the application we’ll be building. You can download the zip file and extract it on your computer, or run the command below in your terminal to clone the repository to your filesystem.
$ git clone https://github.com/Freshman-tech/pomodoro-starter-files.gitOnce the repository is downloaded, cd into it in your terminal:
$ cd pomodoro-starter-filesNext, run the following command to install the browser-sync dependency which
is used to automatically refresh the browser once a file is changed.
$ npm installFinally, start the app on http://localhost:3000 using the following command:
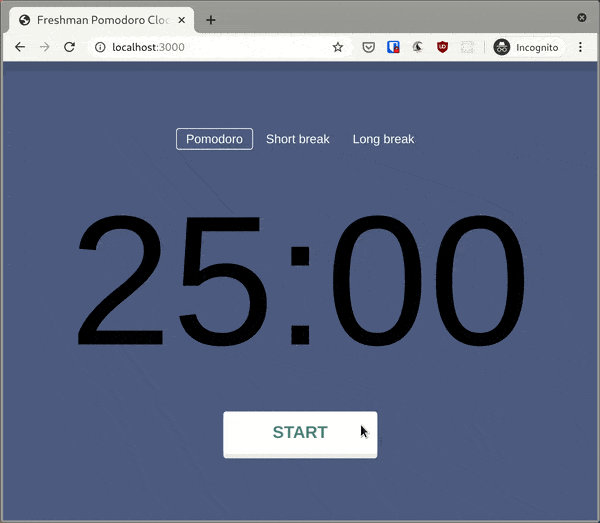
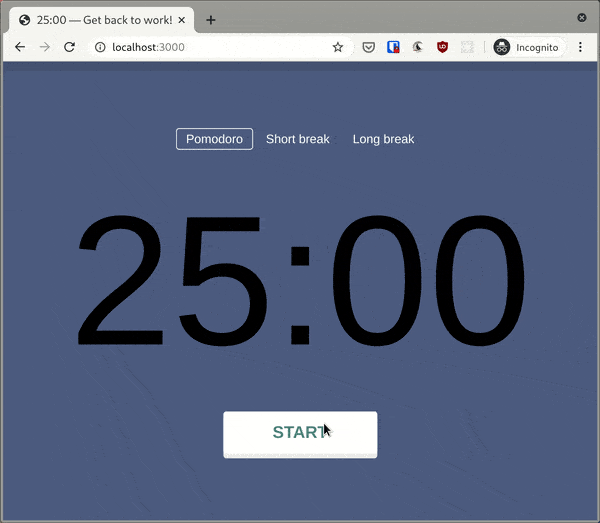
$ npm startAt this point, this is what you should see in your browser:
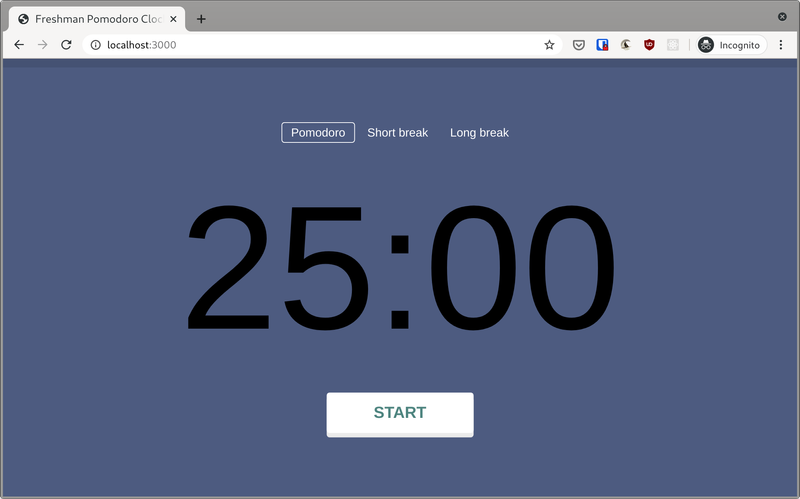
Open http://localhost:3000 in your browser to view the application
Update the timer
The interface of the application is quite simple. At the top of the page is a progress bar, and following that you have three buttons denoting the three modes of the application. Next, we have the countdown timer and a start button immediately after.
A traditional pomodoro session is 25 minutes, and a short break lasts for five
minutes. A long break (15 minutes) is activated after four consecutive pomodoro
sessions. Let’s turn this information into code by creating a timer variable
with the following properties:
const timer = {
  pomodoro: 25,
  shortBreak: 5,
  longBreak: 15,
  longBreakInterval: 4,
};
The next thing we need to do is update the countdown with the appropriate amount of minutes and seconds once any of the three buttons above it is clicked. To do this we need to create an event listener that detects a click on the buttons and a function to switch the mode of the timer appropriately.
Add the following lines of code just below the timer object in your main.js
file:
const modeButtons = document.querySelector('#js-mode-buttons');
modeButtons.addEventListener('click', handleMode);

function handleMode(event) {
  const { mode } = event.target.dataset;

  if (!mode) return;

  switchMode(mode);
}
Here, we use event delegation to detect a click on any of the mode buttons. The
modeButtons variable points to the containing element and once a click is
detected on the element, the handleMode() function is invoked.
Within the handleMode() function, the value of the data-mode attribute is
retrieved from the target element. If this attribute does not exist, it means
that the target element was not one of the buttons and the function exits.
Otherwise, a switchMode() function is invoked with the value of the
data-mode attribute as its only argument.
Go ahead and create the switchMode() function just above handleMode() as
shown below:
function switchMode(mode) {
timer.mode = mode;
timer.remainingTime = {
total: timer[mode] * 60,
minutes: timer[mode],
seconds: 0,
};
document
.querySelectorAll('button[data-mode]')
.forEach(e => e.classList.remove('active'));
document.querySelector(`[data-mode="${mode}"]`).classList.add('active');
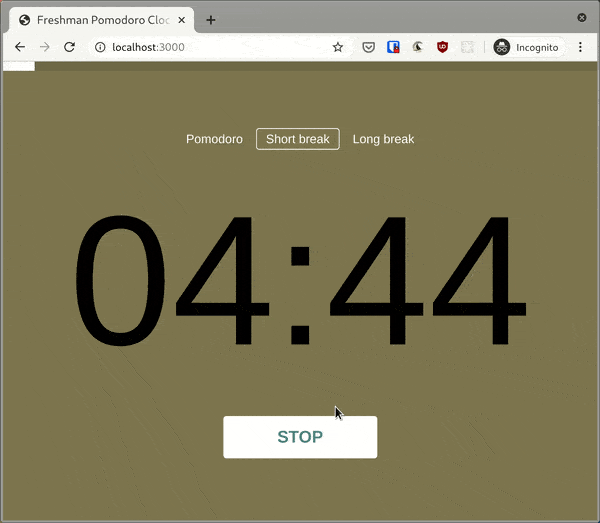
document.body.style.backgroundColor = `var(--${mode})`;
updateClock();
}The switchMode() function above adds two new properties to the timer object.
First, a mode property is set to the current mode which could be pomodoro,
shortBreak or longBreak. Next, a remainingTime property is set on the
timer. This is an object which contains three properties of its own:
totalis the total number of seconds remaining. This is set to the number of minutes of the current mode multiplied by 60. For example, ifmodeisshortBreak,totalwill be set to 300 (the result of 5 ⨉ 60).minutesis the number of minutes for the mode. For example, a pomodoro session is 25 minutes.secondsis always set to zero at the start of a session.
Following that, the active class is removed from all the mode buttons and set
on the one that was clicked, and the background colour of the page is updated.
The use of CSS custom
properties
makes this sort of operation a lot easier.
22:root {
23  --pomodoro: hsl(223, 25%, 40%);
24  --shortBreak: hsl(48, 23%, 40%);
25  --longBreak: hsl(105, 16%, 40%);
26}
After all that, an updateClock() function is invoked. This function is how the
countdown portion of the application is updated. Add it just above the
switchMode() function as shown below:
function updateClock() {
  const { remainingTime } = timer;
  const minutes = `${remainingTime.minutes}`.padStart(2, '0');
  const seconds = `${remainingTime.seconds}`.padStart(2, '0');

  const min = document.getElementById('js-minutes');
  const sec = document.getElementById('js-seconds');
  min.textContent = minutes;
  sec.textContent = seconds;
}
The updateClock() function extracts the value of the minutes and seconds
properties on the remainingTime object and pads them with zeros where
necessary so that the number always has a width of two. For example, 8 seconds
will become 08 seconds, but 12 minutes will be left as 12 minutes.
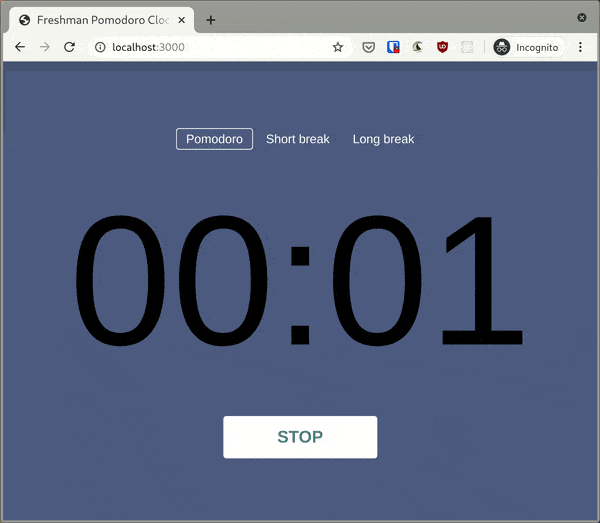
Next, the countdown timer is updated by changing the text content of the relevant elements. At this point, the app should work similarly to the GIF below.
Start the timer
The next step is to add the ability to start the timer and countdown to zero.
Declare an interval variable below timer:
let interval;This variable will be assigned to an instance of the setInterval() method in a
new startTimer() function which should be added just above updateClock():
function startTimer() {
  let { total } = timer.remainingTime;
  const endTime = Date.parse(new Date()) + total * 1000;

  interval = setInterval(function() {
    timer.remainingTime = getRemainingTime(endTime);
    updateClock();

    total = timer.remainingTime.total;
    if (total <= 0) {
      clearInterval(interval);
    }
  }, 1000);
}
Before we can start the timer, we need to get the exact time in the future when
the timer will end. This is achieved by retrieving the timestamp of the current
moment (Date.parse(new Date())) which is in milliseconds and adding the total
number of milliseconds in the session to it. For reference, 1 second = 1000ms.
This value is then stored in the endTime variable.
The interval variable is set to the setInterval() method which executes the
callback function every 1000 milliseconds (1 second). This callback function
references a getRemainingTime() function which should be created above
startTimer as follows:
function getRemainingTime(endTime) {
  const currentTime = Date.parse(new Date());
  const difference = endTime - currentTime;

  const total = Number.parseInt(difference / 1000, 10);
  const minutes = Number.parseInt((total / 60) % 60, 10);
  const seconds = Number.parseInt(total % 60, 10);

  return {
    total,
    minutes,
    seconds,
  };
}
The function above takes a timestamp argument and finds the difference between
the current time and the end time in milliseconds. This value is stored in the
difference variable and used to compute the total number of seconds left by
dividing by 1000. The result is subsequently converted to an integer in base 10
through the Number.parseInt() method and stored in the total variable.
The minutes variable contains the number of whole minutes left (if any) and
seconds is the number of seconds left after whole minutes have been accounted
for. For example, if total is 230 seconds, minutes will equal 3 and seconds
will be 50.
Finally, an object containing the values of total, minutes, and seconds is
returned from the function. This corresponds to the structure of the
timer.remainingTime object seen earlier.
Back to the startTimer() function, we can see that the return value of
getRemainingTime() is stored in the timer.remainingTime property. Next,
updateClock() is invoked which updates the countdown to the latest value.
Following that, the updated value of the total property in
timer.remainingTime is extracted and checked to see if it is less than or
equal to zero. If so, the clearInterval() method is called with the interval
variable as its only argument and this causes setInterval() to be cancelled
and the countdown ends.
Let’s call the startTimer() function once the start button is clicked. Add the
following code just above the modeButtons variable:
const mainButton = document.getElementById('js-btn');
mainButton.addEventListener('click', () => {
  const { action } = mainButton.dataset;
  if (action === 'start') {
    startTimer();
  }
});
Once the main button is clicked, the value of the data-action attribute on
the button is stored in an action variable and checked to see if it’s equal to
“start”. If so, the startTimer() function is invoked and the countdown begins.
We need to make a small modification to startTimer() so that the button text
changes to “stop” and the button becomes depressed like a hardware button.
function startTimer() {
  let { total } = timer.remainingTime;
  const endTime = Date.parse(new Date()) + total * 1000;

  mainButton.dataset.action = 'stop';
  mainButton.textContent = 'stop';
  mainButton.classList.add('active');

  interval = setInterval(function() {
    timer.remainingTime = getRemainingTime(endTime);
    updateClock();

    total = timer.remainingTime.total;
    if (total <= 0) {
      clearInterval(interval);
    }
  }, 1000);
}
Now, once the countdown timer starts, the value of the button’s data-action
attribute and its text content is changed to “stop”. Also, the active class is
added to the button causing it to become depressed.
A final thing to do in this section is to ensure that the mode and remainingTime
properties are set on the timer object on page load. To do so, we can execute
the switchMode() property once the DOMContentLoaded event is fired.
document.addEventListener('DOMContentLoaded', () => {
switchMode('pomodoro');
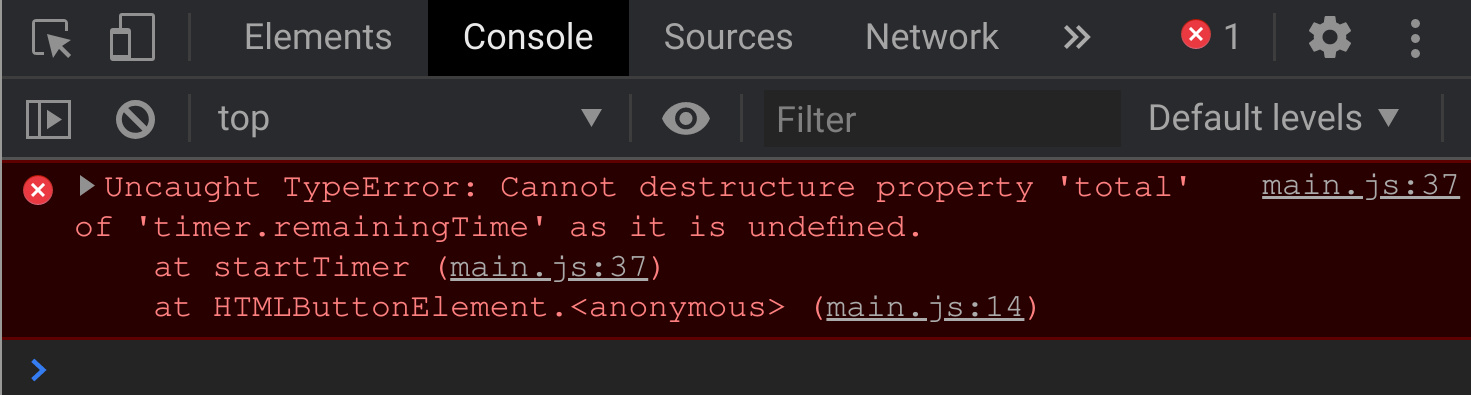
});This ensures that the default mode for the timer is pomodoro and the contents
of timer.remainingTime is set to the appropriate values for a pomodoro
session. If the above snippet is not present, the program will crash with a
TypeError if startTimer() is invoked because timer.remainingTime
will not exist and we’re trying to access the value of the total property in
that object on the first line of the function.
At this point, you can test the app by setting the timer.pomodoro property to
1 temporarily and then click the start button to start the countdown to zero.
Remember to return it to 25 before moving on to the next section.
Stop the timer
The next step is to stop the timer when the stop button is clicked. This button
is the same one used to start the timer. It’s the value of the data-action
attribute on the button that allows us to determine whether to start or stop the
timer.
Add a new stopTimer() function below startTimer() as shown below:
function stopTimer() {
  clearInterval(interval);

  mainButton.dataset.action = 'start';
  mainButton.textContent = 'start';
  mainButton.classList.remove('active');
}
In this function, the clearInterval() method is invoked, causing the
setInterval() method triggered in startTimer() to be cancelled so that the
countdown is paused. Next, the value of the button’s data-action
attribute and its text content is changed to “start” and it is returned to its
original form by removing the active class.
To execute stopTimer() when data-action is set to “stop”, modify the
mainButton event listener as shown below:
mainButton.addEventListener('click', () => {
  const { action } = mainButton.dataset;
  if (action === 'start') {
    startTimer();
  } else {
    stopTimer();
  }
});
Finally, we also need to stop the timer when the mode is changed by clicking any of the three buttons above the countdown:
function handleMode(event) {
  const { mode } = event.target.dataset;

  if (!mode) return;

  switchMode(mode);
  stopTimer();
}
Automatically start the next session
The timer needs to automatically begin a break session at the end of a pomodoro session and vice versa. Additionally, a long break should be triggered after four consecutive pomodoro sessions. This is what we’ll tackle in this section.
First, add a new sessions property to the timer object as shown below. This
is how we’ll keep track of the number of pomodoro sessions that have been
completed.
const timer = {
  pomodoro: 25,
  shortBreak: 5,
  longBreak: 15,
  longBreakInterval: 4,
  sessions: 0,
};
Next, modify the startTimer() function so that the sessions property is
incremented at the start of a pomodoro session:
function startTimer() {
  let { total } = timer.remainingTime;
  const endTime = Date.parse(new Date()) + total * 1000;

  if (timer.mode === 'pomodoro') timer.sessions++;

  mainButton.dataset.action = 'stop';
  mainButton.textContent = 'stop';
  mainButton.classList.add('active');

  interval = setInterval(function() {
    timer.remainingTime = getRemainingTime(endTime);
    updateClock();

    total = timer.remainingTime.total;
    if (total <= 0) {
      clearInterval(interval);
    }
  }, 1000);
}
The highlighted line above checks if the current mode is pomodoro and
increments the timer.sessions property by 1.
The next step is to auto switch to the next session on completion of the current
one. This also involves a modification to the startTimer() function:
function startTimer() {
  let { total } = timer.remainingTime;
  const endTime = Date.parse(new Date()) + total * 1000;

  if (timer.mode === 'pomodoro') timer.sessions++;

  mainButton.dataset.action = 'stop';
  mainButton.textContent = 'stop';
  mainButton.classList.add('active');

  interval = setInterval(function() {
    timer.remainingTime = getRemainingTime(endTime);
    updateClock();
    total = timer.remainingTime.total;
    if (total <= 0) {
      clearInterval(interval);

      switch (timer.mode) {
        case 'pomodoro':
          if (timer.sessions % timer.longBreakInterval === 0) {
            switchMode('longBreak');
          } else {
            switchMode('shortBreak');
          }
          break;
        default:
          switchMode('pomodoro');
      }

      startTimer();
    }
  }, 1000);
}
Once the countdown reaches zero, the switch statement present above causes the
app to switch to a new break session or pomodoro session depending on the value
of timer.mode.
In the first case, an if statement checks if timer.sessions is divisible by
timer.longBreakInterval without a remainder and switches to long break mode if
so. Otherwise, a short break session is triggered. The default case is
executed if a break session is ending which causes a new pomodoro session to
begin.
Finally, startTimer() is executed again causing the countdown to start again
as before. If you didn’t know already, it’s possible to execute a function from
within itself we’ve just done.
To test this out, you can set the value of the pomodoro, shortBreak and
longBreak properties of the timer object to 1 temporarily, and observe how
each session leads to the next.
Update the progress bar
In this section, we’ll update the progress bar so that it reflects the progress
of each countdown. The progress bar is aptly represented by the <progress>
element which needs a max and a value attribute.
12<progress id="js-progress" value="0"></progress>By default, the value attribute is set to zero indicating that no progress has
been made but the max attribute is left out. This attribute is essential to
determine what represents 100% completion of a task and it must be greater than
zero.
We can set the max attribute on the <progress> element in switchMode() as
shown below. It’s set to the total amount of seconds in the countdown.
function switchMode(mode) {
  timer.mode = mode;
  timer.remainingTime = {
    total: timer[mode] * 60,
    minutes: timer[mode],
    seconds: 0,
  };

  document
    .querySelectorAll('button[data-mode]')
    .forEach(e => e.classList.remove('active'));
  document.querySelector(`[data-mode="${mode}"]`).classList.add('active');
  document.body.style.backgroundColor = `var(--${mode})`;
  document
    .getElementById('js-progress')
    .setAttribute('max', timer.remainingTime.total);

  updateClock();
}
Next, change your updateClock() function as follows:
function updateClock() {
  const { remainingTime } = timer;
  const minutes = `${remainingTime.minutes}`.padStart(2, '0');
  const seconds = `${remainingTime.seconds}`.padStart(2, '0');

  const min = document.getElementById('js-minutes');
  const sec = document.getElementById('js-seconds');
  min.textContent = minutes;
  sec.textContent = seconds;

  const progress = document.getElementById('js-progress');
  progress.value = timer[timer.mode] * 60 - timer.remainingTime.total;
}
Each time updateClock() is invoked, the value attribute of the <progress>
element is updated to the result of the remaining amount of seconds subtracted
from the total number of seconds in the session and this causes the progress bar
to update accordingly.
Reflect the countdown in the page title
For practical reasons, it is beneficial for the countdown and status of the timer to be reflected in the page title. This allows the user to quickly see how many minutes are left in a session without switching tabs.
Modify your updateClock() function as follows:
function updateClock() {
  const { remainingTime } = timer;
  const minutes = `${remainingTime.minutes}`.padStart(2, '0');
  const seconds = `${remainingTime.seconds}`.padStart(2, '0');

  const min = document.getElementById('js-minutes');
  const sec = document.getElementById('js-seconds');
  const time = `${minutes}:${seconds}`;
  min.textContent = minutes;
  sec.textContent = seconds;

  const text = timer.mode === 'pomodoro' ? 'Get back to work!' : 'Take a break!';
  document.title = `${minutes}:${seconds} — ${text}`;

  const progress = document.getElementById('js-progress');
  progress.value = timer[timer.mode] * 60 - timer.remainingTime.total;
}
Changing the title of the page is as simple as updating the value of the
document.title property to the desired string. The ternary operator is used to
modify the title depending on if the current mode is set to pomodoro or not.
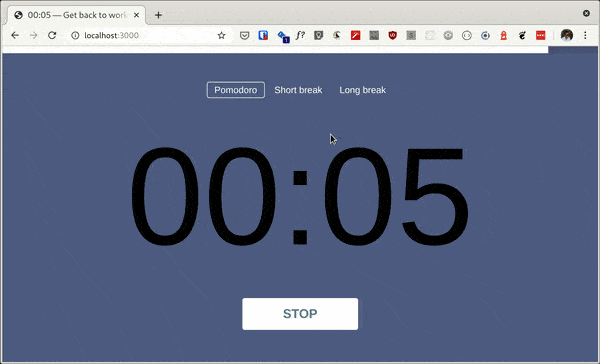
Notice how the page title updates along with the countdown timer
Play sounds
Let’s add some interest to our pomodoro app by playing sounds on certain events. First, we’ll play a sound if the timer is started or stopped and also when transitioning from a pomodoro to a break session (or vice versa).
We’ll tackle the case of starting and stopping the timer first. The relevant
audio file in the project folder is button-sound.mp3. All we need to do is
create a new audio object using this file, and play the sound each time
mainButton is clicked. Here’s how:
const buttonSound = new Audio('button-sound.mp3');
const mainButton = document.getElementById('js-btn');
mainButton.addEventListener('click', () => {
  buttonSound.play();
  const { action } = mainButton.dataset;
  if (action === 'start') {
    startTimer();
  } else {
    stopTimer();
  }
});
Let’s continue by playing a sound on the transition from one session to another.
In the index.html file, we have three audio elements which have a data-sound
attribute corresponding to the three modes available. All we need to do is
select the appropriate one and play it during the transition.
49<audio src="backtowork.mp3" data-sound="pomodoro"></audio>
50<audio src="break.mp3" data-sound="shortBreak"></audio>
51<audio src="break.mp3" data-sound="longBreak"></audio>
Add the following line below the switch block in the startTimer() function:
document.querySelector(`[data-sound="${timer.mode}"]`).play();And that’s all we need to do here. Once a pomodoro session ends and a break session begins, a ringing sound is heard. On the other hand, a “Get back to work” message is played when transitioning to a pomodoro session.
Display notifications
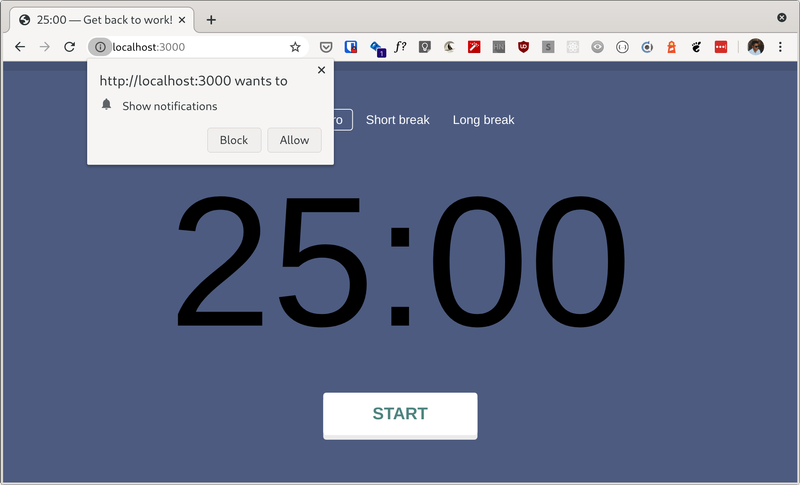
Notifications are another way we can draw a user’s attention when transitioning between sessions. Before we can display a notification to the user, we need to ask for permission first. We’ll do this when the page loads. If the request is granted, we can proceed to display notifications otherwise, we won’t be able to.
Modify the document event listener as shown below:
document.addEventListener('DOMContentLoaded', () => {
  // Let's check if the browser supports notifications
  if ('Notification' in window) {
    // If notification permissions have neither been granted or denied
    if (Notification.permission !== 'granted' && Notification.permission !== 'denied') {
      // ask the user for permission
      Notification.requestPermission().then(function(permission) {
        // If permission is granted
        if (permission === 'granted') {
          // Create a new notification
          new Notification(
            'Awesome! You will be notified at the start of each session'
          );
        }
      });
    }
  }

  switchMode('pomodoro');
});
This code will display a notice in your browser asking you to grant notifications permission to the webpage. Ensure to grant this permission before proceeding. Once granted, a test notification will be displayed.
Next, add the following lines below the switch block in startTimer to
display a notification when transitioning to a new session:
if (Notification.permission === 'granted') {
  const text =
    timer.mode === 'pomodoro' ? 'Get back to work!' : 'Take a break!';
  new Notification(text);
}
The above snippet ensures that a new notification is displayed when a new session begins. As demonstrated earlier, the ternary operator is used to set the text in the notification based on the current state of the timer.
Conclusion
You’ve reached the end of this tutorial. At this point, you should have a functioning Pomodoro timer application with useful features like sound alerts and notifications. If you have any questions or suggestions, please leave a comment below.
Thanks for reading, and happy coding!