How to build a Simon Game with JavaScript
Creating games in the browser is a great way to practice your JavaScript skills and have fun at the same time!
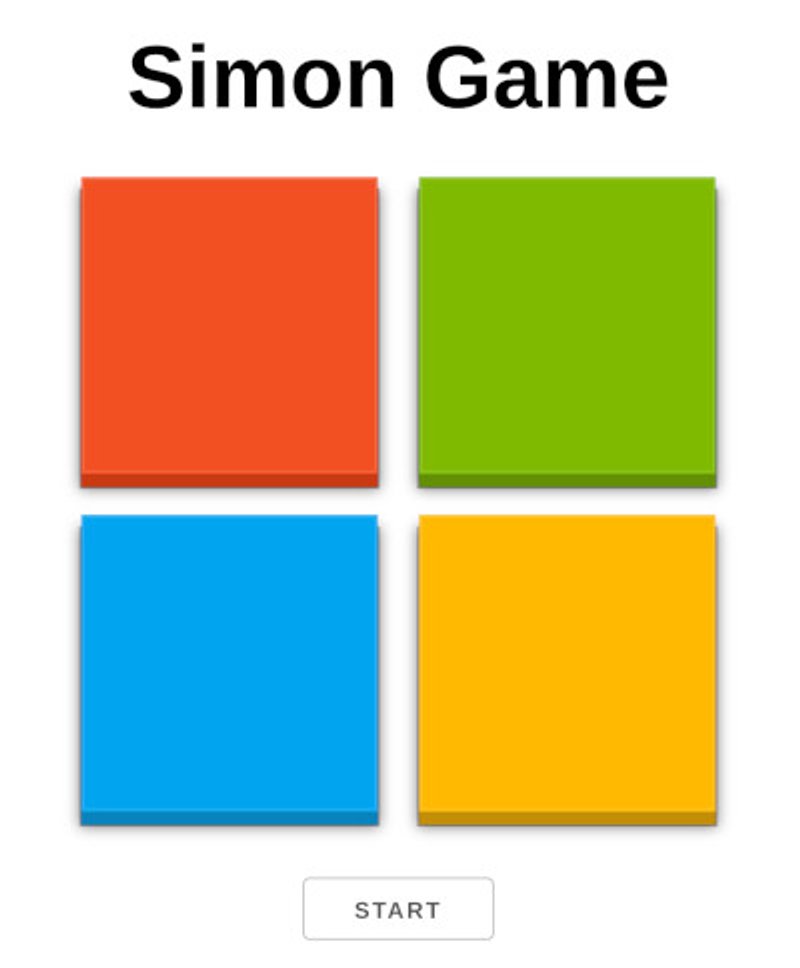
In this tutorial, we’ll develop the classic Simon Game with JavaScript. The object of the game is to repeat a series of random tile clicks created by the game. After each round, the sequence becomes progressively longer and more complex which makes it harder to remember.
Play a live version of the game.
Typically, you’ll have four different tiles, each with a unique colour and sound which is activated when pressed. The sound aids the player in remembering the sequence and the game ends if the player misses a step in the sequence.
Prerequisites
This tutorial assumes a basic knowledge of JavaScript and the DOM.
Getting started
Grab the HTML and CSS files for the game on GitHub. The instructions for setting up the project are in the included README file. You can also follow the tutorial using JSFiddle if you prefer.
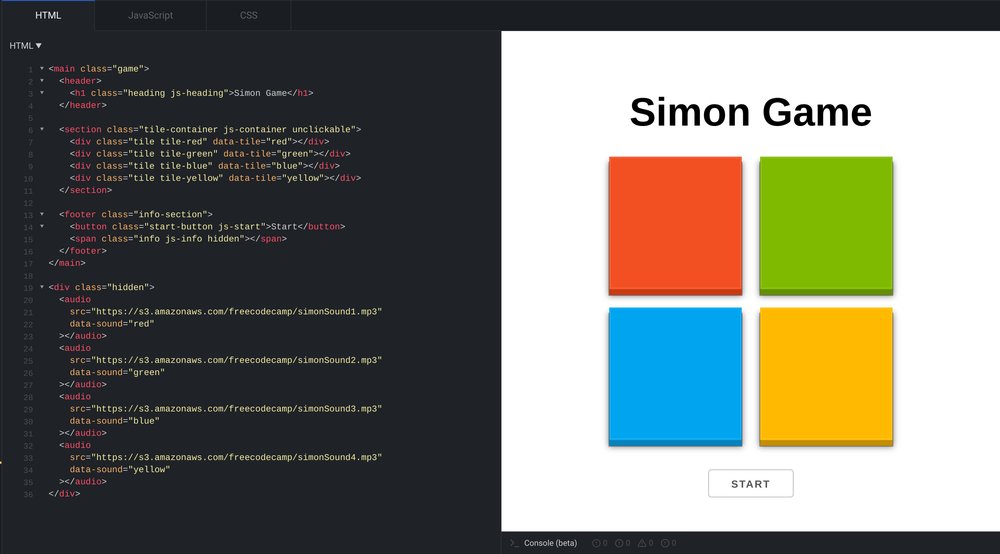
Here's the starting point on JSFiddle
As mentioned earlier, a round begins when the game activates one or more tiles in a random order and ends when the player reproduces the order by pressing the tiles. On the next round, the number of tiles in the sequence increases by one.
Let’s start by creating an array to keep track of the original sequence of tile clicks and a second array for the human sequence:
let sequence = [];
let humanSequence = [];
Next, select the start button and create a new startGame() function that will be
executed when this button is clicked.
const startButton = document.querySelector('.js-start');

function startGame() {
  startButton.classList.add('hidden');
}

startButton.addEventListener('click', startGame);
At this point, once the start button is pressed, it will be hidden. The .info
element also needs to come into view because that is where status messages will
be displayed. It has the hidden class by applied default in the HTML which has been styled with
display: none; in the CSS so
that’s what needs to be removed once the game starts.
<span class="info js-info hidden"></span>Update your JavaScript file as shown below:
const startButton = document.querySelector('.js-start');
const info = document.querySelector('.js-info');

function startGame() {
  startButton.classList.add('hidden');
  info.classList.remove('hidden');
  info.textContent = 'Wait for the computer';
}
Now, once the start button is clicked, the .info element displays a message
telling the user to wait for the sequence to finish.
Start the next round
Create a new level variable below humanSequence. It’s how we’ll keep track
of the number of rounds that have been played so far.
let level = 0;Next, create a new nextRound() function just above startGame() as shown in the
snippet below. The purpose of this function is to start the next sequence of
tile clicks.
function nextRound() {
  level += 1;

  // copy all the elements in the `sequence` array to `nextSequence`
  const nextSequence = [...sequence];
}
Each time nextRound() invoked, the level variable is incremented by 1 and the
next sequence is prepared. Each new round builds upon the previous one so what
we need to do is copy the existing order of button presses and add a new random
one to it. We’ve done the former on the last line of nextRound(), so let’s now
add a new random button press to the sequence.
Create a new nextStep() function just above nextRound():
function nextStep() {
  const tiles = ['red', 'green', 'blue', 'yellow'];
  const random = tiles[Math.floor(Math.random() * tiles.length)];

  return random;
}
The tiles variable contains the colours for each button on the game board.
Notice how the values correspond with the values of the data-tile property in
the HTML.
<div class="tile tile-red" data-tile="red"></div>
<div class="tile tile-green" data-tile="green"></div>
<div class="tile tile-blue" data-tile="blue"></div>
<div class="tile tile-yellow" data-tile="yellow"></div>
We need to get a random value from the array each time nextStep() is executed,
and we’re able to achieve that by using the Math.random() function in
combination with Math.floor(). The former returns a floating-point,
pseudo-random number in the range 0 to less than 1.
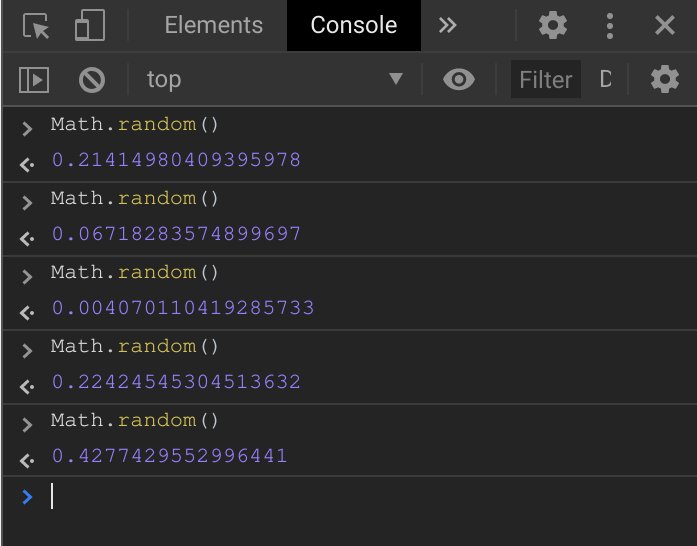
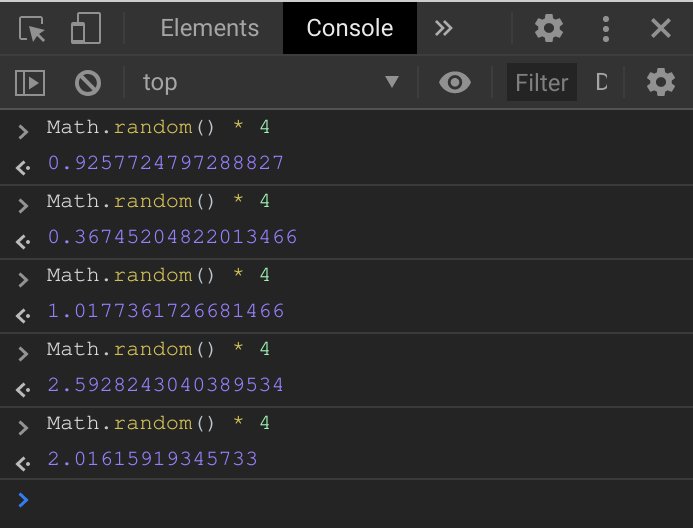
That’s not very useful to us at the moment. It needs to be converted to a valid
index for the tiles array (0, 1, 2, or 3 in this case) so that a random value
is from the array can be retrieved each time. Multiplying the value from
Math.random() with the length of tiles (which is 4) ensures that the range
of the random number is now between 0 and less than 4 (instead of 0 and less
than 1).
Still, those fractional values are not valid array indexes, so Math.floor() is
used to round the numbers down to the largest integer less than or equal the
given value. This gives us whole integers between 0 and 3 which can be used to
retrieve a random value from the tiles array.

Let’s utilise the return value of the nextStep() function in nextRound() as
shown below:
function nextRound() {
  level += 1;

  const nextSequence = [...sequence];
  nextSequence.push(nextStep());
}
What happens here is that when nextStep() is executed, it returns a random value
from the tiles array (“red”, “blue”, “green”, or “yellow”), and the value is
added to the end of the nextSequence() array alongside any values from the
previous round.
Play the next round
The next step is to actually play the next round by activating the tiles on the
screen in the right order. Add the following functions above nextStep() in your
JavaScript file:
function activateTile(color) {
  const tile = document.querySelector(`[data-tile='${color}']`);
  const sound = document.querySelector(`[data-sound='${color}']`);

  tile.classList.add('activated');
  sound.play();

  setTimeout(() => {
    tile.classList.remove('activated');
  }, 300);
}

function playRound(nextSequence) {
  nextSequence.forEach((color, index) => {
    setTimeout(() => {
      activateTile(color);
    }, (index + 1) * 600);
  });
}
The playRound() function takes a sequence array and iterates over it. It then
uses the setTimeout() function to call the activateTile() at 600 millisecond
intervals for each value in the sequence. The reason setTimeout() is used here
is to add an artificial delay between each button press. Without it, the tiles
in the sequence will be activated all at once.
The specified number of milliseconds in the setTimeout() function changes on
each iteration. The first button in the sequence is activated after 600ms, the
next one after 1200ms (600ms after the first), the third one after 1800ms, and
so on.
In the activateTile() function, the value of color is used to select the
appropriate tile and audio elements. In the HTML file, notice how
the data-sound attribute on the audio elements correspond to the button
colours.
<audio src="https://s3.amazonaws.com/freecodecamp/simonSound1.mp3" data-sound="red" ></audio>
<audio src="https://s3.amazonaws.com/freecodecamp/simonSound2.mp3" data-sound="green" ></audio>
<audio src="https://s3.amazonaws.com/freecodecamp/simonSound3.mp3" data-sound="blue" ></audio>
<audio src="https://s3.amazonaws.com/freecodecamp/simonSound4.mp3" data-sound="yellow" ></audio>
The activated class is added to the selected tile, and the play() method is
triggered on the selected audio element causing the linked mp3 file in the src
attribute to be played. After 300 milliseconds, the activated class is removed
again. The effect is that each tile is activated for 300ms, and there are
300ms between tile activations in the sequence.
Finally, call playRound() in the nextRound() function and call nextRound()
in the startGame() function as shown below:
function nextRound() {
  level += 1;

  const nextSequence = [...sequence];
  nextSequence.push(nextStep());
  playRound(nextSequence);
}

function startGame() {
  startButton.classList.add('hidden');
  info.classList.remove('hidden');
  info.textContent = 'Wait for the computer';
  nextRound();
}
Now, once you hit the start button, the first round will begin and a random button will be activated on the board.
The player’s turn
Once the computer begins a round by activating the next sequence of tiles, the player needs to end the round by repeating the pattern of tile activations in the right order. If a step is missed along the way, the game ends and resets.
Select the heading and tile container elements below the info variable:
const heading = document.querySelector('.js-heading');
const tileContainer = document.querySelector('.js-container');
Next, create a humanTurn function that indicates that the computer is finished
with the round, and that it’s time for the player to repeat the sequence:
function humanTurn(level) {
  tileContainer.classList.remove('unclickable');
  info.textContent = `Your turn: ${level} Tap${level > 1 ? 's' : ''}`;
}
The first step is to remove the unclickable class from the tile container.
This class prevents the buttons from being pressed when the game has not started
and when the AI is not finished with the sequence of presses.
.unclickable {
  pointer-events: none;
}
On the next line, the contents of the info element is changed to indicate that
the player can begin to repeat the sequence. It also shows how many taps needs
to be entered.
The humanTurn() function needs to be executed after the computer’s sequence is
over so we cannot call it immediately. We need to add an artificial delay and
calculate when the computer will be done with the sequence of button taps.
function nextRound() {
  level += 1;

  const nextSequence = [...sequence];
  nextSequence.push(nextStep());
  playRound(nextSequence);

  sequence = [...nextSequence];
  setTimeout(() => {
    humanTurn(level);
  }, level * 600 + 1000);
}
The setTimeout() function above executes humanTurn() one second after the
the last button in the sequence is activated. The total duration of the sequence
corresponds to the current level multiplied by 600ms which is the duration for
each tile in the sequence. The sequence variable is also assigned to the
updated sequence.
In the next update to nextRound(), the unclickable class is added to the
tile container when the round starts, and the contents of the info and
heading elements are updated.
function nextRound() {
  level += 1;

  tileContainer.classList.add('unclickable');
  info.textContent = 'Wait for the computer';
  heading.textContent = `Level ${level} of 20`;

  const nextSequence = [...sequence];
  nextSequence.push(nextStep());
  playRound(nextSequence);

  sequence = [...nextSequence];
  setTimeout(() => {
    humanTurn(level);
  }, level * 600 + 1000);
}
The heading now reflects the current level
The next step is to detect the player’s button taps and decide whether to move
to the next round or end the game. Add the following event listener just below
the one for startButton:
tileContainer.addEventListener('click', event => {
  const { tile } = event.target.dataset;

  if (tile) handleClick(tile);
});
In the event listener above, the value of data-tile on the element that was
clicked is accessed and stored in the tile variable. If the value is not an
empty string (for elements without the data-tile attribute), the
handleClick() function is executed with the tile value as its only argument.
Create the handleClick() function just above startGame() as shown below:
function handleClick(tile) {
  const index = humanSequence.push(tile) - 1;
  const sound = document.querySelector(`[data-sound='${tile}']`);
  sound.play();

  const remainingTaps = sequence.length - humanSequence.length;

  if (humanSequence.length === sequence.length) {
    humanSequence = [];
    info.textContent = 'Success! Keep going!';
    setTimeout(() => {
      nextRound();
    }, 1000);
    return;
  }

  info.textContent = `Your turn: ${remainingTaps} Tap${
    remainingTaps > 1 ? 's' : ''
  }`;
}
This function pushes the tile value to the humanSequence array and stores its
index in the index variable. The corresponding sound for the button is played
and the remaining steps in the sequence is calculated and updated on the screen.
The if block compares the length of the humanSequence array to sequence
array. If they’re equal, it means that the round is over and the next round can
begin. At that point, the humanSequence array is reset and the nextRound()
function is called after one second. The delay is to allow the user to see the
success message, otherwise, it will not appear at all because it will get
overwritten immediately.
Compare the sequences
We need to compare the order in which the player taps the buttons to the order of the sequence generated by the game. If the order does not match, the game resets and a message is show alerting the player to the failure.
Create a new resetGame() function for this purpose above humanTurn():
function resetGame(text) {
  alert(text);
  sequence = [];
  humanSequence = [];
  level = 0;
  startButton.classList.remove('hidden');
  heading.textContent = 'Simon Game';
  info.classList.add('hidden');
  tileContainer.classList.add('unclickable');
}
This function displays an alert and restores the game to its original state.
Let’s use it in handleClick as shown below:
function handleClick(tile) {
  const index = humanSequence.push(tile) - 1;
  const sound = document.querySelector(`[data-sound='${tile}']`);
  sound.play();

  const remainingTaps = sequence.length - humanSequence.length;

  if (humanSequence[index] !== sequence[index]) {
    resetGame('Oops! Game over, you pressed the wrong tile');
    return;
  }

  if (humanSequence.length === sequence.length) {
    humanSequence = [];
    info.textContent = 'Success! Keep going!';
    setTimeout(() => {
      nextRound();
    }, 1000);
    return;
  }

  info.textContent = `Your turn: ${remainingTaps} Tap${
    remainingTaps > 1 ? 's' : ''
  }`;
}
If the value of the element retrieved by the index in both the sequence and
humanSequence arrays do not match, it means the player made a wrong turn. At
that point, an alert is displayed and the game resets.
Prepare an end state
The game mostly works but we need to introduce an end state where the player wins the game. I’ve picked 20 rounds, but you can use any number you like. The classic Simon Game ended after 35 rounds.
Here’s the bit that ends the game if the user reaches and completes the 20th round:
function handleClick(tile) {
  const index = humanSequence.push(tile) - 1;
  const sound = document.querySelector(`[data-sound='${tile}']`);
  sound.play();

  const remainingTaps = sequence.length - humanSequence.length;

  if (humanSequence[index] !== sequence[index]) {
    resetGame('Oops! Game over, you pressed the wrong tile');
    return;
  }

  if (humanSequence.length === sequence.length) {
    if (humanSequence.length === 20) {
      resetGame('Congrats! You completed all the levels');
      return
    }

    humanSequence = [];
    info.textContent = 'Success! Keep going!';
    setTimeout(() => {
      nextRound();
    }, 1000);
    return;
  }

  info.textContent = `Your turn: ${remainingTaps} Tap${
    remainingTaps > 1 ? 's' : ''
  }`;
}
Once the 20th round is completed, a congratulatory message is displayed and the game resets. Make sure to try it out and see if you can reach level 20 without failing.
Conclusion
In this tutorial, we developed a functioning Simon game with JavaScript. I hope you had a lot of fun building it. You can take it further by experimenting with different designs or by adding extra features. There are also several clones you can learn from and use as an inspiration.
Thanks for reading, and happy coding!