How to Build Your First Web Application with Go
One of Go’s greatest strengths lies in the its suitability for developing web applications. It offers great performance out of the box, is easy to deploy, and has many of the necessary tools you need to build and deploy a scalable web service in its standard library. This tutorial will walk you through a practical example of building a web application with Go and deploying it to production. It will cover the basics of using Go’s built-in HTTP server and templating language, and how to interact with external APIs.
In this article, you will discover how to leverage Go for web development by building a news application in the language. It’s a simple app that fetches news articles matching a particular search query through the News API and presents the results on a webpage. You’ll also learn how to deploy the web application to production at the end of the tutorial.

Checkout the live demo on Heroku
The complete code used in this tutorial can be accessed in this GitHub repository.
Prerequisites
The only requirement for this tutorial is that you have Go installed on your
computer and that you are vaguely familiar
with its syntax and constructs. The version of Go that I used while building the
app is 1.15. To view the version of Go that you have installed, use the go version command.
go versiongo version go1.15 linux/amd64Downloading the starter files
Clone the starter files repo on
GitHub and cd into
the created directory using the command below:
git clone https://github.com/Freshman-tech/news-demo-starter-files && cd news-demo-starter-filesAfterwards, run the tree command to view the contents of the repository:
treeWe have three main files in this directory: The main.go file is where we’ll
write the application code, the index.html file is the template that will be
sent to the browser, while the assets/styles.css file is where the application
styles reside.
.
├── assets
│   └── style.css
├── index.html
├── LICENCE
├── main.go
└── README.md
Creating a web server
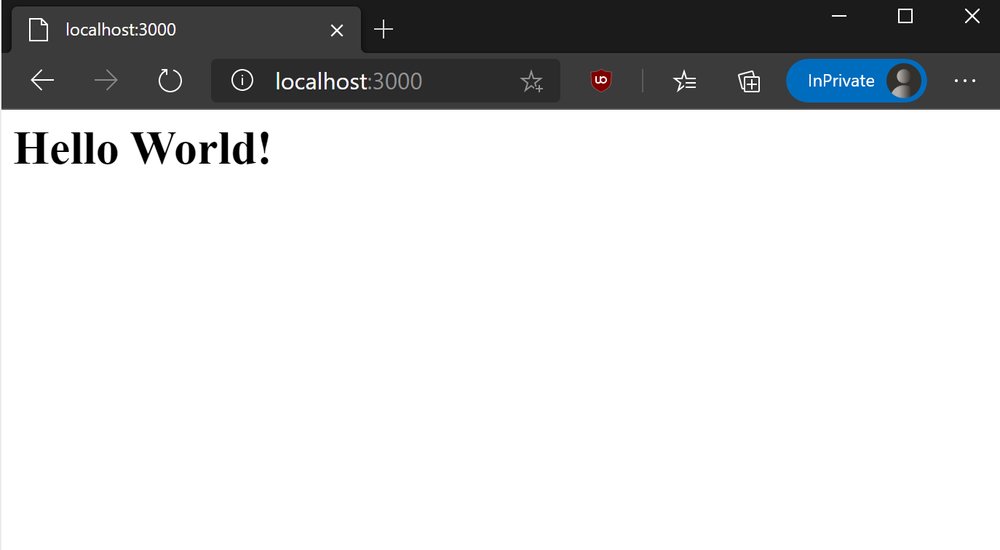
Let’s start by creating a basic server that sends a “Hello World!” text to the
browser when a GET request is made to the server root. Modify your main.go file
as shown below:
package main

import (
	"net/http"
	"os"
)

func indexHandler(w http.ResponseWriter, r *http.Request) {
	w.Write([]byte("<h1>Hello World!</h1>"))
}

func main() {
	port := os.Getenv("PORT")
	if port == "" {
		port = "3000"
	}

	mux := http.NewServeMux()

	mux.HandleFunc("/", indexHandler)
	http.ListenAndServe(":"+port, mux)
}
The first line, package main declares that the code in the main.go file
belongs to the main package. In the next few lines, the net/http and os
packages are imported into the file. The former provides HTTP client and server implementations for use in our
app, while the latter is how we’re able to access operating system
functionality.
In the main function, an attempt is made to set the port variable based on
the value of the PORT environment variable. If the variable is not present,
Getenv() returns an empty string and port is set to 3000 so that the server
is made available at http://localhost:3000.
Next, the http.NewServeMux() method is used to create an HTTP
request multiplexer which is subsequently assigned to the mux variable.
Essentially, a request multiplexer matches the URL of incoming
requests against a list of registered patterns, and calls the associated handler
for the pattern whenever a match is found.
Registering HTTP request handlers is done via the HandleFunc method which takes the pattern string as its first argument, and a function with the following signature:.
func(w http.ResponseWriter, r *http.Request)If you look at the indexHandler function, you can see that it has this exact
signature making it a valid second argument to HandleFunc. The w parameter
is the structure we use to send responses to an HTTP request. It implements a
Write() method which accepts a slice of bytes and writes the data to the
connection as part of an HTTP response.
On the other hand, the r parameter represents the HTTP request received from
the client. It’s how we access the data sent by a client to the server. We
are not yet using it here, but we will definitely make use of it later on.
Finally, we have the http.ListenAndServe() method which starts the server on
the port defined in the port variable. Feel free to use another port if
3000 is in use on your machine.
Next, compile and execute the code you just wrote:
go build./news-demo-starter-filesIf you go to http://localhost:3000 in your browser, you should see the text “Hello World!” displayed on your screen.
Reading variables from the environment
A common pattern regarding environmental variables is to load them from a .env
file into the environment. godotenv is a Go
port of the Ruby dotenv library. It allows
you to define your application’s environment variables in a .env file and load
them into the environment at the start of the program.
The first thing you need to do is create a .env file in the root of your
project directory and open it in your text editor:
$ vim .envSet the PORT environmental variable within the file:
PORT=3000Next, install the godotenv package by running the following command in your
project directory:
$ go get github.com/joho/godotenvThen update your main.go file as shown below:
package main

import (
	"log"
	"net/http"
	"os"

	"github.com/joho/godotenv"
)

func indexHandler(w http.ResponseWriter, r *http.Request) {
	w.Write([]byte("<h1>Hello World!</h1>"))
}

func main() {
	err := godotenv.Load()
	if err != nil {
		log.Println("Error loading .env file")
	}

	port := os.Getenv("PORT")
	if port == "" {
		port = "3000"
	}

	mux := http.NewServeMux()

	mux.HandleFunc("/", indexHandler)
	http.ListenAndServe(":"+port, mux)
}
The Load method reads the .env file and loads the set variables into the
environment so that they can be accessed through the os.Getenv() method. This
is especially helpful for storing secret credentials in the environment which
we will do later in the tutorial.
Getting started with templating in Go
Let’s go over the basics of templating in Go. If you are familiar with the idea of templates in other languages, it should be easy enough to understand.
Templates provide an easy way to customize the output of your web application depending on the route without having to write the same code in many places. For example, we can create a template for the navigation bar and use it across all pages of the site without duplicating the code. On top of that, we also get the ability to add some basic logic to our web pages.
Go provides two template packages in its standard library: text/template and
html/template. They provide the same interface, but the html/template
package is used to generate output that is safe against code injection.
Go ahead and import html/template in your main.go file, then use it as
follows:
package main

import (
	"html/template"
	"log"
	"net/http"
	"os"

	"github.com/joho/godotenv"
)

var tpl = template.Must(template.ParseFiles("index.html"))

func indexHandler(w http.ResponseWriter, r *http.Request) {
	tpl.Execute(w, nil)
}

. . .
tpl is a package level variable that points to a template definition from the
provided files. The call to template.ParseFiles parses the index.html file
in the root of our project directory and validates it.
The invocation of template.ParseFiles is wrapped with template.Must so that
the code panics if an error is obtained while parsing the template file. The
reason we panic here instead of trying to handle the error, is because a web app
with a broken template is not much of a web app. It’s a problem that should be
fixed before attempting to restart the server.
In the indexHandler function, the tpl template is executed by providing two
arguments: where we want to write the output to, and the data we want to pass to
the template.
In the above case, we’re writing the output to the ResponseWriter interface
and, since we don’t have any data to pass to our template at this time, nil is
passed as the second argument.
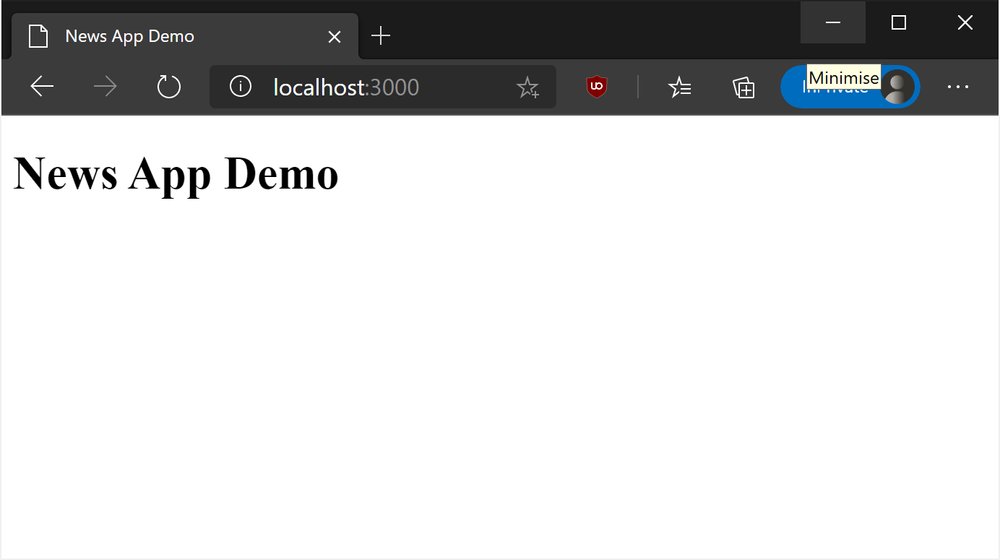
Stop the running process in your terminal using Ctrl-C, then build
and run the web server again with go build && ./news-demo-starter-files, then
refresh your browser. You should see the text “News App Demo” on the page as
shown below:
Automatically restarting the server
It is quite tedious to build and restart the server every time you make a change in the code. Fortunately, you can avoid that with the help of the Air package. If you’re on Go 1.16 or later, run the command below to install the package:
go install github.com/cosmtrek/air@latestThen run the air command at the root of your project directory:
airFrom now on, Air will build and run your web server each time you create, modify or delete a Go or template file in the project. You can check its docs for more information on how to use it.
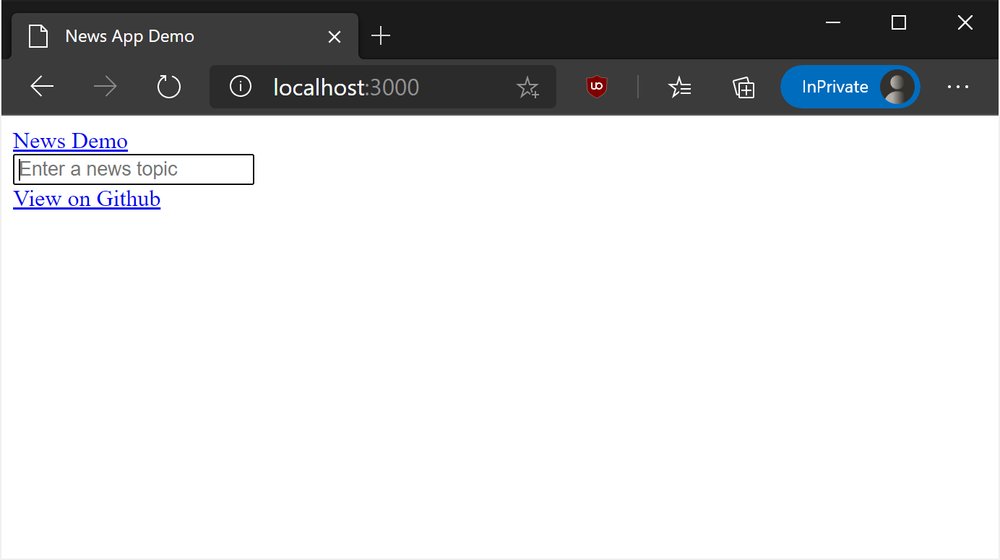
Adding a navigation bar
Replace the contents of the <body> tag in your index.html file as shown
below:
<!DOCTYPE html>
<html lang="en">
  <head>
    <meta charset="UTF-8" />
    <meta name="viewport" content="width=device-width, initial-scale=1.0" />
    <meta http-equiv="X-UA-Compatible" content="ie=edge" />
    <title>News App Demo</title>
    <link rel="stylesheet" href="/assets/style.css" />
  </head>
  <body>
    <main>
      <header>
        <a class="logo" href="/">News Demo</a>
        <form action="/search" method="GET">
          <input
            autofocus
            class="search-input"
            value=""
            placeholder="Enter a news topic"
            type="search"
            name="q"
          />
        </form>
        <a
          href="https://github.com/freshman-tech/news"
          class="button github-button"
          >View on GitHub</a
        >
      </header>
    </main>
  </body>
</html>
Once you refresh your browser, you should see the elements added above in the rendered output:
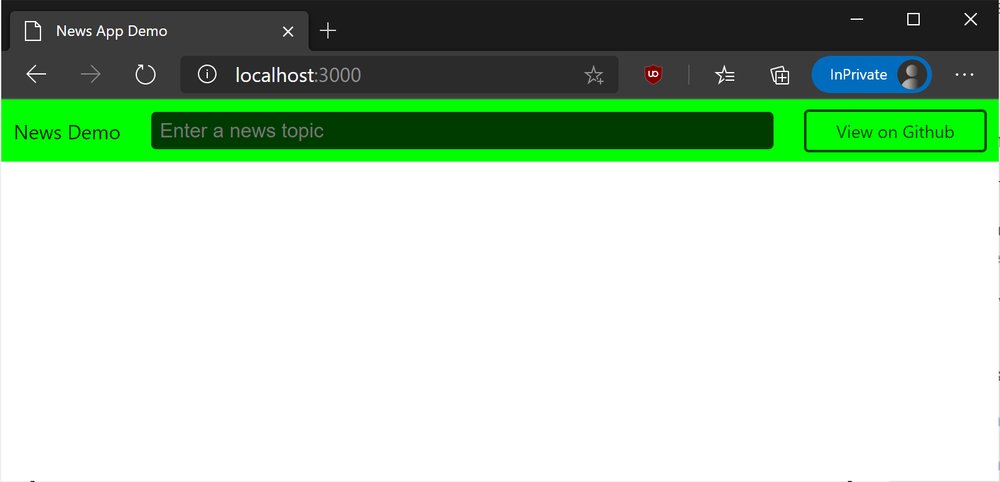
Serving static files
Note how the navigation bar we added above remains bare despite the fact that
the assets/style.css file is linked correctly in the <head> of our document.
This is because we haven’t registered the /assets pattern in the
HTTP multiplexer. We need to make sure that all requests that match
this pattern are served as static files.
The first thing to do is to instantiate a file server object by passing the directory where all our static files are placed:
fs := http.FileServer(http.Dir("assets"))Next, we need to tell our router to use this file server object for all paths
beginning with the /assets/ prefix:
mux.Handle("/assets/", http.StripPrefix("/assets/", fs))The http.StripPrefix() method modifies the request URL by
stripping off the specified prefix before forwarding the handling of the request
to the http.Handler in the second parameter.
For example, if a request is made for the /assets/style.css file,
StripPrefix() will cut the /assets/ part and forward the modified request to
the handler returned by http.FileServer() so it will see the requested
resource as style.css. It will then look for and serve the resource relative
to the folder that you specified as the root directory for static file (assets
in this case).
All together now:
. . .
func main() {
	err := godotenv.Load()
	if err != nil {
		log.Println("Error loading .env file")
	}

	port := os.Getenv("PORT")
	if port == "" {
		port = "3000"
	}

	fs := http.FileServer(http.Dir("assets"))

	mux := http.NewServeMux()
	mux.Handle("/assets/", http.StripPrefix("/assets/", fs))
	mux.HandleFunc("/", indexHandler)
	http.ListenAndServe(":"+port, mux)
}
Notice the use of Handle instead of HandleFunc here. That’s because the
http.FileServer() method returns an
http.Handler type instead of an
HandlerFunc
Once you refresh your browser, the styles should kick in as shown below:
Creating the search route
Let’s create the route that handles search requests for news articles. We’ll be
making use of the News API for processing the queries so
you need to sign up for a free API key
here. Once you retrieve your API
key, add it to the .env file as shown below:
PORT=3000
NEWS_API_KEY=<your api key>
Return to your main.go file and add a new searchHandler function below the
indexHandler function:
import (
"fmt"
"html/template"
"log"
"net/http"
"net/url"
"os"
"github.com/joho/godotenv"
)
var tpl = template.Must(template.ParseFiles("index.html"))
func indexHandler(w http.ResponseWriter, r *http.Request) {
tpl.Execute(w, nil)
}
func searchHandler(w http.ResponseWriter, r *http.Request) {
u, err := url.Parse(r.URL.String())
if err != nil {
http.Error(w, err.Error(), http.StatusInternalServerError)
return
}
params := u.Query()
searchQuery := params.Get("q")
page := params.Get("page")
if page == "" {
page = "1"
}
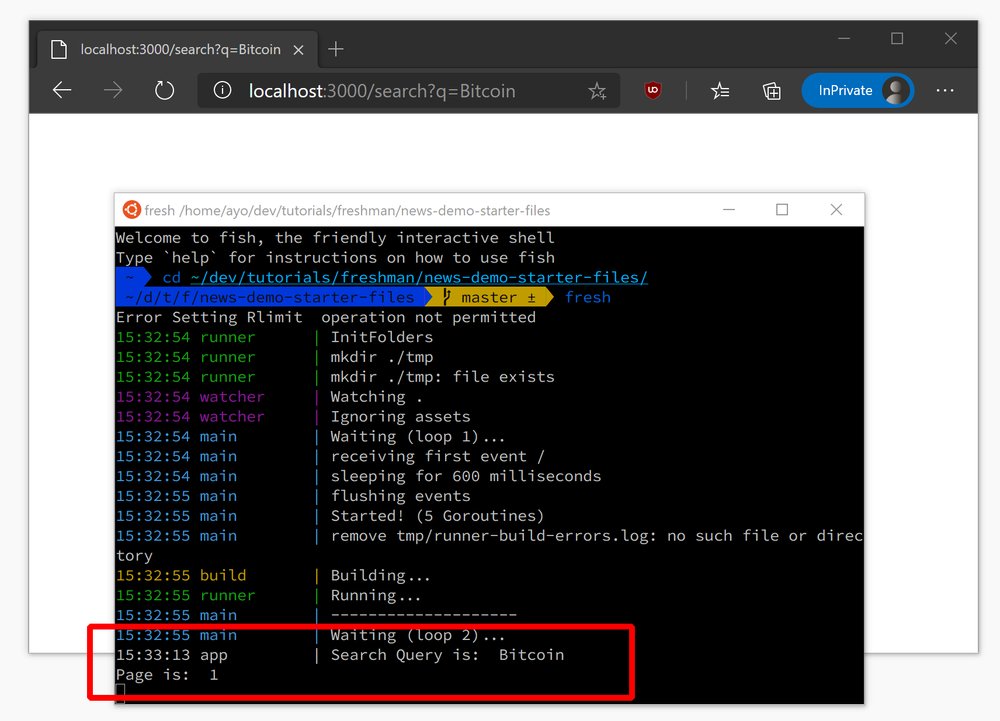
fmt.Println("Search Query is: ", searchQuery)
fmt.Println("Page is: ", page)
}
. . .This route expects two query parameters: q represents the user’s query, and
page is used to page through the results. This page parameter is optional.
If it’s not included in the URL, we’ll just assume that the page is
1. The above code extracts the q and page parameters from the request
URL and prints them both to the standard output.
Register the searchHandler function as the handler for the /search pattern
as shown below:
. . .
func main() {
  . . .
	mux := http.NewServeMux()

	fs := http.FileServer(http.Dir("assets"))
	mux.Handle("/assets/", http.StripPrefix("/assets/", fs))

	mux.HandleFunc("/search", searchHandler)
	mux.HandleFunc("/", indexHandler)
	http.ListenAndServe(":"+port, mux)
}
At this point, you can type a query into the search input and you should see it printed in the terminal in the manner shown below:
Creating the News API client
In this section, you’ll create an API client for the purpose of working with the
News API. First, create a news folder at the root of your project directory:
mkdir newsNext, create a news.go file within the news directory:
touch news/news.goOpen the news.go file in your text editor, and populate it with the following
code:
package news

import "net/http"

type Client struct {
	http     *http.Client
	key      string
	PageSize int
}

func NewClient(httpClient *http.Client, key string, pageSize int) *Client {
	if pageSize > 100 {
		pageSize = 100
	}

	return &Client{httpClient, key, pageSize}
}
The Client struct represents the client for working with the News
API. The httpClient field points to the HTTP client
that should be used to make requests, apiKey field holds the API
key while the PageSize field holds the number of results to return per page
(maximum of 100). The NewClient() function creates and returns a new Client
instance for making requests to the News API.
Return to your main.go file, retrieve the News API key from the
environment, and create a new Client instance as shown below:
import (
	"fmt"
	"html/template"
	"log"
	"net/http"
	"net/url"
	"os"
	"time"

	"github.com/freshman-tech/news-demo-starter-files/news"
	"github.com/joho/godotenv"
)

. . .

func main() {
	err := godotenv.Load()
	if err != nil {
		log.Println("Error loading .env file")
	}

	port := os.Getenv("PORT")
	if port == "" {
		port = "3000"
	}

	apiKey := os.Getenv("NEWS_API_KEY")
	if apiKey == "" {
		log.Fatal("Env: apiKey must be set")
	}

	myClient := &http.Client{Timeout: 10 * time.Second}
	newsapi := news.NewClient(myClient, apiKey, 20)

	. . .
}We need to access the newsapi variable inside searchHandler so that we can
use it to make requests to newsapi.org. We could make newsapi a package-level
variable and assign the return value of NewClient() to it so that we can
access it from anywhere in the main package:
var newsapi *news.Client

func main() {
	err := godotenv.Load()
	if err != nil {
		log.Println("Error loading .env file")
	}

	port := os.Getenv("PORT")
	if port == "" {
		port = "3000"
	}

	apiKey := os.Getenv("NEWS_API_KEY")
	if apiKey == "" {
		log.Fatal("Env: apiKey must be set")
	}

	myClient := &http.Client{Timeout: 10 * time.Second}
	newsapi := news.NewClient(myClient, apiKey, 20)

	. . .
}
Another approach would be to utilise a closure to access the newsapi client.
This is potentially a better solution since it makes testing much easier. Modify
your main.go file as shown below:
func searchHandler(newsapi *news.Client) http.HandlerFunc {
	return func(w http.ResponseWriter, r *http.Request) {
		u, err := url.Parse(r.URL.String())
		if err != nil {
			http.Error(w, err.Error(), http.StatusInternalServerError)
			return
		}

		params := u.Query()
		searchQuery := params.Get("q")
		page := params.Get("page")
		if page == "" {
			page = "1"
		}

		fmt.Println("Search Query is: ", searchQuery)
		fmt.Println("Page is: ", page)
	}
}

func main() {
	. . .
	myClient := &http.Client{Timeout: 10 * time.Second}
	newsapi := news.NewClient(myClient, apiKey, 20)

	fs := http.FileServer(http.Dir("assets"))

	mux := http.NewServeMux()
	mux.Handle("/assets/", http.StripPrefix("/assets/", fs))

	mux.HandleFunc("/search", searchHandler(newsapi))
	mux.HandleFunc("/", indexHandler)
	http.ListenAndServe(":"+port, mux)
}
The searchHandler function has been changed. It now accepts a pointer to
news.Client and returns an anonymous function which satisfies the
http.HandlerFunc type. This function closes over the newsapi parameter which
means it will have access to it whenever it is called.
Making requests to the News API
The News API provides two main endpoints for retrieving news items. We’ll be making use of the /everything endpoint in this tutorial which outputs a JSON response in the following format:
{
  "status": "ok",
  "totalResults": 4661,
  "articles": [
    {
      "source": {
        "id": null,
        "name": "Gizmodo.com"
      },
      "author": "Jennings Brown",
      "title": "World's Dumbest Bitcoin Scammer Tries to Scam Bitcoin Educator, Gets Scammed in The Process",
      "description": "Ben Perrin is a Canadian cryptocurrency enthusiast and educator who hosts a bitcoin show on YouTube. This is immediately apparent after a quick a look at all his social media. Ten seconds of viewing on of his videos will show that he is knowledgeable about di…",
      "url": "https://gizmodo.com/worlds-dumbest-bitcoin-scammer-tries-to-scam-bitcoin-ed-1837032058",
      "urlToImage": "https://i.kinja-img.com/gawker-media/image/upload/s--uLIW_Oxp--/c_fill,fl_progressive,g_center,h_900,q_80,w_1600/s4us4gembzxlsjrkmnbi.png",
      "publishedAt": "2019-08-07T16:30:00Z",
      "content": "Ben Perrin is a Canadian cryptocurrency enthusiast and educator who hosts a bitcoin show on YouTube. This is immediately apparent after a quick a look at all his social media. Ten seconds of viewing on of his videos will show that he is knowledgeable about..."
    }
  ]
}
As you can see, each article is an object embedded in the articles array. To
work with this data in Go, we need to generate a struct that mirrors the data
when decoding the response body. For example, the above JSON object
becomes the following Go struct:
type Results struct {
	Status       string `json:"status"`
	TotalResults int    `json:"totalResults"`
	Articles     []struct {
		Source struct {
			ID   interface{} `json:"id"`
			Name string      `json:"name"`
		} `json:"source"`
		Author      string    `json:"author"`
		Title       string    `json:"title"`
		Description string    `json:"description"`
		URL         string    `json:"url"`
		URLToImage  string    `json:"urlToImage"`
		PublishedAt time.Time `json:"publishedAt"`
		Content     string    `json:"content"`
	} `json:"articles"`
}
This struct represents the JSON data in its entirety. Each struct
field has a type and a tag which specifies the JSON property that
the field should map to. Also, the struct fields are all upper case because the
encoding/json package can only decode into exported struct fields.
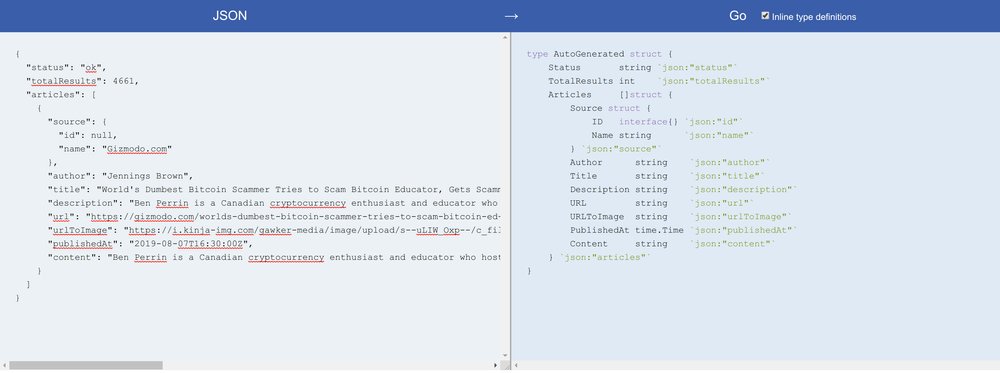
Creating a Go representation of a JSON object can be done using the JSON-to-Go website. All you need to do is copy the JSON object and paste it into the appropriate field, then copy the output and paste it in your code.
Open up your news.go file and include the structs shown below:
import (
	"net/http"
	"time"
)

type Article struct {
	Source struct {
		ID   interface{} `json:"id"`
		Name string      `json:"name"`
	} `json:"source"`
	Author      string    `json:"author"`
	Title       string    `json:"title"`
	Description string    `json:"description"`
	URL         string    `json:"url"`
	URLToImage  string    `json:"urlToImage"`
	PublishedAt time.Time `json:"publishedAt"`
	Content     string    `json:"content"`
}

type Results struct {
	Status       string    `json:"status"`
	TotalResults int       `json:"totalResults"`
	Articles     []Article `json:"articles"`
}
The Results struct is exactly the same as the one shown earlier, except that
Article is now it’s own struct instead of being defined inline as before.
Now that we have modelled the expected JSON object, let’s go ahead
and make requests to the News API, then decode the response body
into the Results struct.
Create a new method on the Client struct as shown below:
import (
	"encoding/json"
	"fmt"
	"io/ioutil"
	"net/http"
	"net/url"
	"time"
)

type Client struct {
	http     *http.Client
	key      string
	PageSize int
}

func (c *Client) FetchEverything(query, page string) (*Results, error) {
	endpoint := fmt.Sprintf("https://newsapi.org/v2/everything?q=%s&pageSize=%d&page=%s&apiKey=%s&sortBy=publishedAt&language=en", url.QueryEscape(query), c.PageSize, page, c.key)
	resp, err := c.http.Get(endpoint)
	if err != nil {
		return nil, err
	}

	defer resp.Body.Close()

	body, err := ioutil.ReadAll(resp.Body)
	if err != nil {
		return nil, err
	}

	if resp.StatusCode != http.StatusOK {
		return nil, fmt.Errorf(string(body))
	}

	res := &Results{}
	return res, json.Unmarshal(body, res)
}
The FetchEverything() endpoint accepts two arguments: the search query, and
the page number. These are appended to the request URL in addition
to the API key and page size. Notice that the search query is
URL encoded through the QueryEscape() method.
On the next line, the HTTP request is made through the custom HTTP client which we created earlier. This custom client has been set to timeout after 10 seconds. The default client does not have any timeout so it is not recommended for production use.
If the response from News API is not 200
OK, a generic error is
returned. Otherwise, the response body is converted to a byte slice using the
ioutil.ReadAll() method and subsequently decoded into the Result struct
through the json.Unmarshal() method.
Let’s go ahead and utilise the FetchEverything method in our searchHandler:
func searchHandler(newsapi *news.Client) http.HandlerFunc {
return func(w http.ResponseWriter, r *http.Request) {
u, err := url.Parse(r.URL.String())
if err != nil {
http.Error(w, err.Error(), http.StatusInternalServerError)
return
}
params := u.Query()
searchQuery := params.Get("q")
page := params.Get("page")
if page == "" {
page = "1"
}
results, err := newsapi.FetchEverything(searchQuery, page)
if err != nil {
http.Error(w, err.Error(), http.StatusInternalServerError)
return
}
fmt.Printf("%+v", results)
}
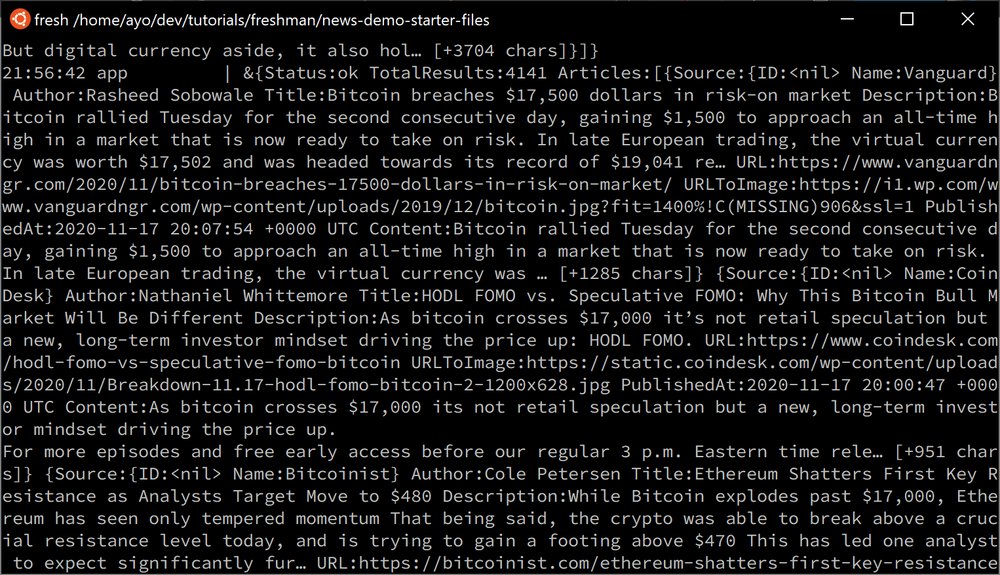
}The search query and page variables are passed as arguments to
FetchEverything() and the JSON response is decoded and stored in
the results variable which is subsequently printed to the standard output.
You can try it out by search for a news topic in the browser. You should see some output similar to what is shown below:
In the next section, we’ll render the results from newsapi.org in the browser.
Rendering the results
Let’s create a struct to represent each query made by the user. Add this
below the tpl variable in your main.go file:
type Search struct {
	Query      string
	NextPage   int
	TotalPages int
	Results    *news.Results
}
Then update your searchHandler function as shown below:
import (
	"html/template"
	"log"
	"math"
	"net/http"
	"net/url"
	"os"
	"strconv"
	"time"

	"github.com/freshman-tech/news-demo-starter-files/news"
	"github.com/joho/godotenv"
)

func searchHandler(newsapi *news.Client) http.HandlerFunc {
	return func(w http.ResponseWriter, r *http.Request) {
		u, err := url.Parse(r.URL.String())
		if err != nil {
			http.Error(w, err.Error(), http.StatusInternalServerError)
			return
		}

		params := u.Query()
		searchQuery := params.Get("q")
		page := params.Get("page")
		if page == "" {
			page = "1"
		}

		results, err := newsapi.FetchEverything(searchQuery, page)
		if err != nil {
			http.Error(w, err.Error(), http.StatusInternalServerError)
			return
		}

		nextPage, err := strconv.Atoi(page)
		if err != nil {
			http.Error(w, err.Error(), http.StatusInternalServerError)
			return
		}

		search := &Search{
			Query:      searchQuery,
			NextPage:   nextPage,
			TotalPages: int(math.Ceil(float64(results.TotalResults) / float64(newsapi.PageSize))),
			Results:    results,
		}
	}
}
The page variable is converted to an integer and assigned to nextPage, then
an instance of the Search struct is created with all the necessary fields.
TotalPages is computed by dividing the number of results by the page size, and
rounding the result up to the nearest integer. This will help when it’s time to
add pagination to the app.
At this point, you may execute the template, passing the search struct as the
data object:
import (
	"bytes"
	"html/template"
	"log"
	"math"
	"net/http"
	"net/url"
	"os"
	"strconv"
	"time"

	"github.com/freshman-tech/news-demo-starter-files/news"
	"github.com/joho/godotenv"
)

. . .

func searchHandler(newsapi *news.Client) http.HandlerFunc {
	return func(w http.ResponseWriter, r *http.Request) {
		. . .

		search := &Search{
			Query:      searchQuery,
			NextPage:   nextPage,
			TotalPages: int(math.Ceil(float64(results.TotalResults) / float64(newsapi.PageSize))),
			Results:    results,
		}

		buf := &bytes.Buffer{}
		err = tpl.Execute(buf, search)
		if err != nil {
			http.Error(w, err.Error(), http.StatusInternalServerError)
			return
		}

		buf.WriteTo(w)
	}
}
The template is first executed into an empty buffer so that we can check for
errors. After that, the buffer is written to the ResponseWriter. If we execute
the template directly on ResponseWriter, we won’t be able to check for errors
so this is a better way to do it.
You can also update the indexHandler so that the template is no longer
executed directly to ResponseWriter:
func indexHandler(w http.ResponseWriter, r *http.Request) {
	buf := &bytes.Buffer{}
	err := tpl.Execute(buf, nil)
	if err != nil {
		http.Error(w, err.Error(), http.StatusInternalServerError)
		return
	}

	buf.WriteTo(w)
}
Let’s go ahead and update the index.html file to make use of the search
object that we’re passing to it. Modify the contents of the <main> element as
shown below:
<main>
  <header>
    <a class="logo" href="/">News Demo</a>
    <form action="/search" method="GET">
      <input
        autofocus
        class="search-input"
        value="{{ .Query }}"
        placeholder="Enter a news topic"
        type="search"
        name="q"
      />
    </form>
    <a
      href="https://github.com/freshman-tech/news"
      class="button github-button"
      >View on GitHub</a
    >
  </header>
  <section class="container">
    <ul class="search-results">
      {{ range.Results.Articles }}
      <li class="news-article">
        <div>
          <a target="_blank" rel="noreferrer noopener" href="{{.URL}}">
            <h3 class="title">{{.Title }}</h3>
          </a>
          <p class="description">{{ .Description }}</p>
          <div class="metadata">
            <p class="source">{{ .Source.Name }}</p>
            <time class="published-date">{{ .PublishedAt }}</time>
          </div>
        </div>
        <img class="article-image" src="{{ .URLToImage }}" />
      </li>
      {{ end }}
    </ul>
  </section>
</main>
The dot operator is used to access a struct inside a template. This operator
refers to the entire struct object (search in this case). Accessing field
names is as easy as specifying the field name after the dot (like {{ .Results }}).
The range block allows us to iterate over a slice in Go and output some HTML
for each item in the slice. Here, we’re iterating over the slice of Article
structs contained in the Articles field and outputting some HTML on each
iteration. The dot inside the range block refers to each Article inside the
slice of Articles, and that’s how we’re able to access fields like Title,
Description, e.t.c.
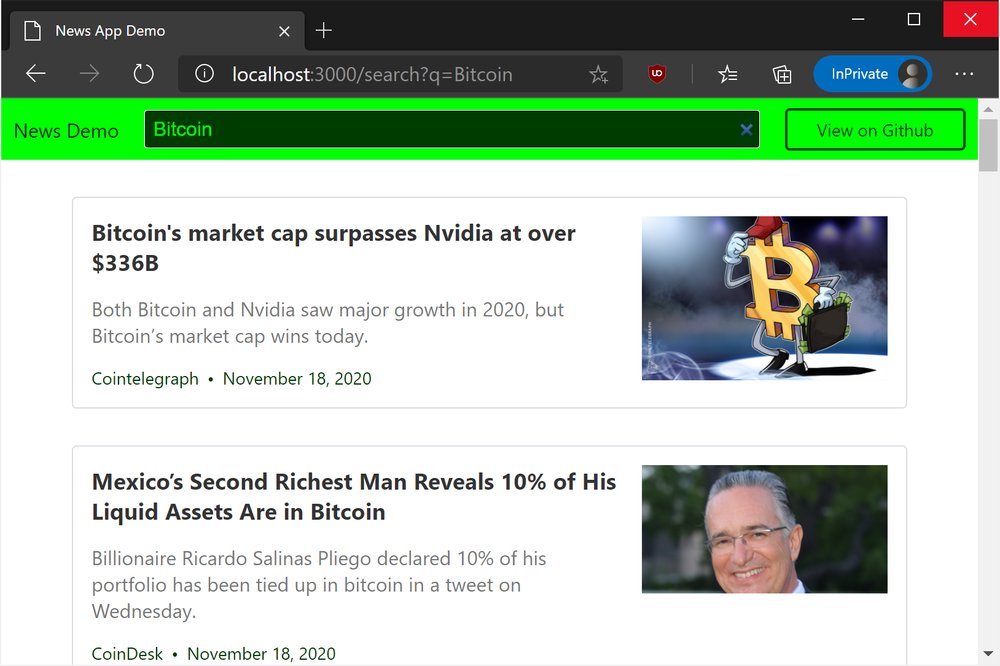
Go ahead and refresh your browser, then search for news items on a popular topic. You should get a list of 20 results on the page similar to the image below.

Formatting the published date
If you look at the date in each article, you can see that it’s not very
readable. This current output is how the API returns the published
date for article. But we can change this easily by adding a method to the
Article struct and use that to format the date instead of using the default
value.
Go ahead and add the following code just below the Article struct in
news.go:
func (a *Article) FormatPublishedDate() string {
	year, month, day := a.PublishedAt.Date()
	return fmt.Sprintf("%v %d, %d", month, day, year)
}
Here, a new FormatPublishedDate() method is created on the Article struct
and this method formats the PublishedAt field on the Article and returns a
string in the following format: January 10, 2009.
To use this new method in your template, replace .PublishedAt with
.FormatPublishedDate in your index.html file then repeat the previous query.
This will output the results with a correctly formatted published time as shown
below:
. . .

<section class="container">
  <ul class="search-results">
    {{ range.Results.Articles }}
      <li class="news-article">
        <div>
          <a target="_blank" rel="noreferrer noopener" href="{{.URL}}">
            <h3 class="title">{{.Title }}</h3>
          </a>
          <p class="description">{{ .Description }}</p>
          <div class="metadata">
            <p class="source">{{ .Source.Name }}</p>
            <time class="published-date">{{ .FormatPublishedDate }}</time>
          </div>
        </div>
        <img class="article-image" src="{{ .URLToImage }}" />
      </li>
    {{ end }}
  </ul>
</section>

. . .
Displaying the total number of results
Let’s improve the user interface of our news app by showing the total number of results at the top of the page, and also display a message for cases where no results are available for a particular query.
All you need to do is add the following code as a child of .container, just
above the .search-results element in your index.html file:
<div class="result-count">
{{ if .Results }}
  {{ if (gt .Results.TotalResults 0)}}
  <p>About <strong>{{ .Results.TotalResults }}</strong> results were found.</p>
  {{ else if and (ne .Query "") (eq .Results.TotalResults 0) }}
  <p>No results found for your query: <strong>{{ .Query }}</strong>.</p>
  {{ end }}
{{ end }}
</div>
Go templates support several comparison functions, some of which are used above.
The gt function is used to check if the TotalResults field of the Results
struct is greater than zero. If it is, the total number of results will be
printed at the top of the page.
Otherwise, if Query is not equal to an empty string ((ne .Query "")) and
TotalResults is equal to zero ((eq .Results.TotalResults 0)), a “No results
found” message is outputted.
You can try this out by typing some gibberish into the search input so that no
news items for your query are found. You should see the No results found
message on the screen.

Go ahead and make another search query on a popular topic. The number of results will be outputted at the top of the page as shown below:

Paginating the results
Since we’re only displaying 20 results at a time, we need a way for the user to
navigate to the next or previous page of results at anytime. First, we’ll add a
Next button at the bottom of the results if the last page of results has not
yet been reached. To determine if the last page of results have been reached,
create this new method below the Search struct definition in main.go:
func (s *Search) IsLastPage() bool {
	return s.NextPage >= s.TotalPages
}
This method checks if the NextPage field is greater than the TotalPages
field on a Search instance. For this to work though, we need to increment
NextPage every time a new page of results is received. Modify the
searchHandler function as shown below:
func searchHandler(w http.ResponseWriter, r *http.Request) {
		. . .
		search := &Search{
			Query:      searchQuery,
			NextPage:   nextPage,
			TotalPages: int(math.Ceil(float64(results.TotalResults) / float64(newsapi.PageSize))),
			Results:    results,
		}

		if ok := !search.IsLastPage(); ok {
			search.NextPage++
		}

		. . .
}
Finally, let’s add a button that will allow the user go to the next page of
results. This following should be placed after the .search-results list in
your index.html file.
<div class="pagination">
{{ if . }}
  {{ if (ne .IsLastPage true) }}
    <a href="/search?q={{ .Query }}&page={{ .NextPage }}" class="button next-page">Next</a>
  {{ end }}
{{ end }}
</div>
As long as the last page for that query has not been reached, the Next
button will be rendered at the bottom of the results list. As you can see, the
href of the anchor tag above points to the /search route and retains the
current search query in the q parameter while using the value of NextPage in
the page parameter.
Let’s throw in a Previous button as well. This button should only be
rendered if the current page is greater than 1. To do this, we’ll need to create
a new CurrentPage() method on Search to help us do just that. Add this below
the IsLastPage method:
func (s *Search) CurrentPage() int {
	if s.NextPage == 1 {
		return s.NextPage
	}

	return s.NextPage - 1
}
The current page is simply NextPage - 1 except if NextPage is 1. To get the
previous page, just subtract 1 from the current page. The following method does
just that:
func (s *Search) PreviousPage() int {
	return s.CurrentPage() - 1
}
So we can add the following code to render the Previous button only if the
current page is greater than 1. Modify the .pagination element in your
index.html as follows:
<div class="pagination">
{{ if . }}
  {{ if (gt .NextPage 2) }}
  <a
    href="/search?q={{ .Query }}&page={{ .PreviousPage }}"
    class="button previous-page"
    >Previous</a
  >
  {{ end }}
  {{ if (ne .IsLastPage true) }}
  <a
    href="/search?q={{ .Query }}&page={{ .NextPage }}"
    class="button next-page"
    >Next</a
  >
  {{ end }}
{{ end }}
</div>
Go ahead and make a new search query in your browser. You should be able to page through the results as shown below:
Indicating the current page
Instead of displaying only the total number of results that were found for a query, it is also helpful for the user to see the total number of pages for that query, and what page he is currently on.
To do this, we only need to modify our index.html file as follows:
<div class="result-count">
{{ if .Results }}
{{ if (gt .Results.TotalResults 0)}}
<p>
About <strong>{{ .Results.TotalResults }}</strong> results were
found. You are on page <strong>{{ .CurrentPage }}</strong> of
<strong> {{ .TotalPages }}</strong
>.
</p>
{{ else if (ne .Query "") and (eq .Results.TotalResults 0) }}
<p>
No results found for your query: <strong>{{ .Query }}</strong
>.
</p>
{{ end }}
{{ end }}
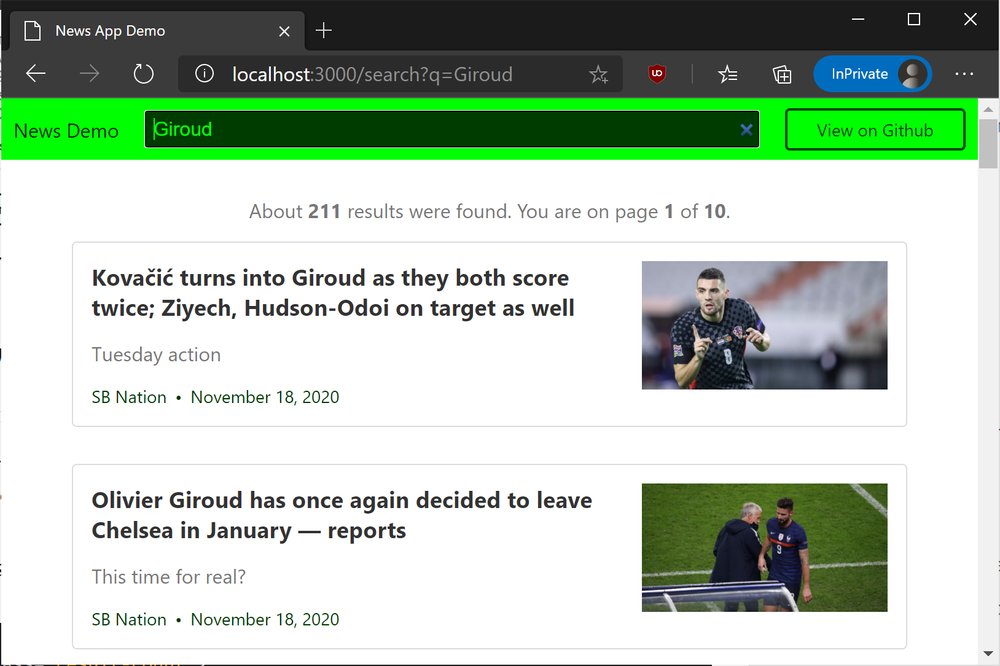
</div>Once make a new search query, the current page and total number of pages will be indicated on top of the page along with the total result count.
Deploying to Heroku
Now that our app is feature complete, let’s go ahead and deploy it to Heroku. Sign up for a free account, then follow this link to create a new app. Give it a unique name. I called mine freshman-news.
Next, follow the instructions here to install the Heroku CLI on your machine. Then run the command below in the terminal to login to your Heroku account:
heroku loginMake sure you’ve initialised a git repository for your project. If not, run the
git init command at the root of your project directory, then run the command
below to set heroku as a remote for your git repo. Replace freshman-news with
the name of your application.
heroku git:remote -a freshman-newsNext, create a Procfile in the root of your project directory (touch Procfile)
and paste in the following contents:
web: bin/news-demo-starter-filesFollowing that, specify the GitHub repo for your project and the version of Go
you are using in your go.mod file as shown below. Create this file if it
doesn’t exist in the project root already.
module github.com/freshman-tech/news-demo-starter-files
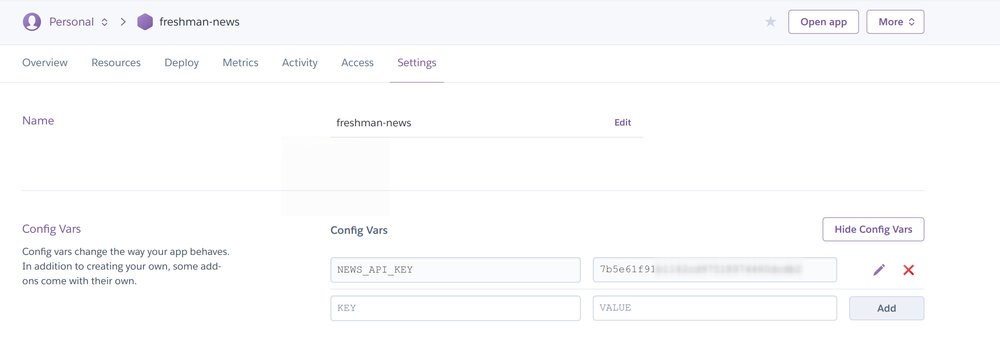
go 1.15Before you deploy the app, head over to the Settings tab in the Heroku
dashboard and hit Reveal Config Vars. Set the NEWS_API_KEY environmental
variable so it may be accessed by the app.
Finally, commit your code and push it to the Heroku remote using the following commands:
git add .git commit -m "Initial commit"git push heroku masterOnce the deployment process is complete, you can open
https://<your-app-name>.herokuapp.com to view and test your project.
Conclusion
In this article, we successfully created a News app and learnt the basics of using Go for web development along the way. We also covered how to deploy the finished application to Heroku. I hope this exercise was helpful to you. If you have any questions regarding this tutorial, please leave a comment below and I’ll get back to you.
Thanks for reading, and happy coding!