How to build a Wikipedia Search App with JavaScript
Let’s jump into web application development by working through a hands-on project together! In this article, you’ll practice the fundamentals of building a web application. Things like making AJAX requests, manipulating DOM nodes, handling errors and displaying alerts.
This tutorial will take you through the process of building an web application that searches Wikipedia and displays the results on page. Here’s how it works: a user can type a search query into an input field in the app. The query is sent to Wikipedia and results are displayed on the page in the format of a regular search engine. You can checkout the live demo here.
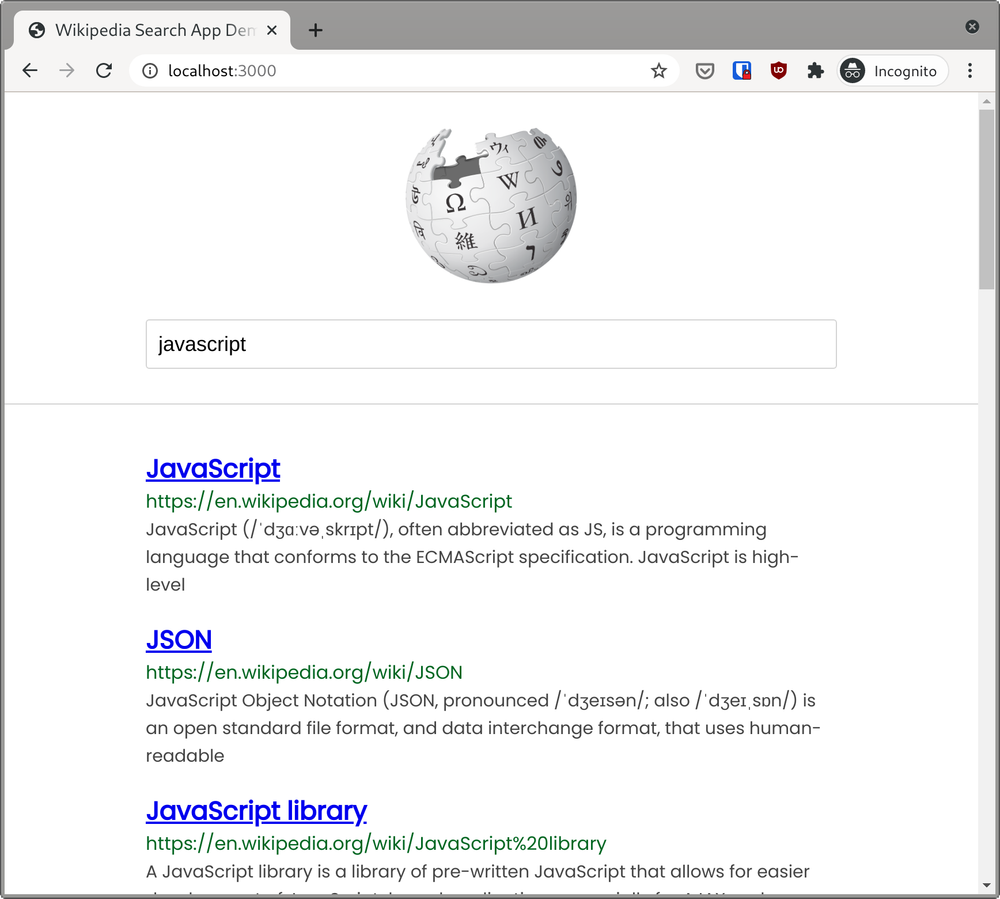
See the live demo
Prerequisites
This tutorial is intended for beginners to who want to learn how to create simple web apps using JavaScript. You need to understand the basics of HTML, CSS and JavaScript before diving in.
If you’ve never built a web app before, I recommend that you start with the tutorial on how to build a Random Quote Generator before coming back to this one.
To complete this tutorial, all you need is a modern web browser (such as Firefox or Chrome) and a working Internet connection. If you get stuck, leave a comment below and I’ll get back to you as soon as I can.
Getting started
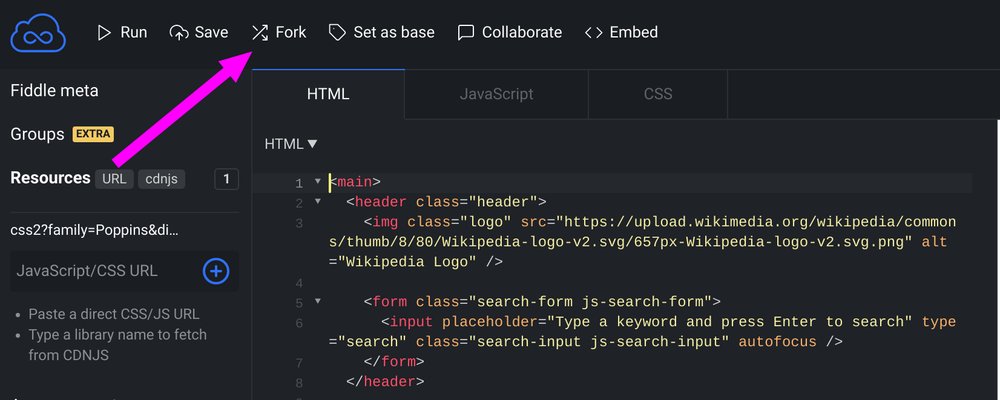
I have created a starting point for this project on JSFiddle. This fiddle contains all the markup and styling that we need for this tutorial. I’ll concentrate only on explaining how the JavaScript works.
Start by forking the code to a new fiddle. This will create a new instance of the fiddle for you to work with. As I walk you through this tutorial, make sure to type each step out into your instance. This will help you learn faster.
You can also use CodePen, JSBin or whatever editor you are familiar with. After each step, you will see a snapshot of the code so you can compare it with your own to ensure you don’t make a mistake.
Access the search query on form submission
The first task is to capture the search query when the form is submitted. You can do
this by listening for the submit event on the .js-search-form element and then
capture whatever the user has typed into the input field.
First off, let’s grab a reference to our form element and store it in a variable:
const form = document.querySelector('.js-search-form');We can grab a reference to an element in the DOM using the
querySelector() method. It returns the first element that matches the
specified
selector
that we pass to it.
Next, we need to listen for the submit event on the form element so that we can capture the search query when the form is submitted. We will attach the addEventListener method to our form node to achieve this.
form.addEventListener('submit', handleSubmit);In the above snippet, addEventListener takes two arguments: submit which is
the DOM event we want to listen for and handleSubmit which is the
function that will run when the event is triggered.
Let’s go ahead and create the handleSubmit function:
function handleSubmit(event) {

}
This function does nothing at the moment, but it takes one parameter which is
the event that triggered the execution of the function. At this point, if you
try submitting the form by hitting the Enter key, you will notice
that the page reloads. This is because the default behaviour in browsers is for
the page to reload when a form is submitted. We can prevent this behaviour by
using event.preventDefault() in the handleSubmit function.
function handleSubmit(event) {
  // prevent page from reloading when form is submitted
  event.preventDefault();
}
Try to submit the form now, the page should not reload anymore.
Let’s go ahead and do something useful with our function. We can grab a reference to the input field and store its value in a variable.
function handleSubmit(event) {
  // prevent page from reloading when form is submitted
  event.preventDefault();
  // get the value of the input field
  const inputValue = document.querySelector('.js-search-input').value;
  // remove whitespace from the input
  const searchQuery = inputValue.trim();
  // print `searchQuery` to the console
  console.log(searchQuery);
}
When handleSubmit is executed, the value of the search input is stored in
inputValue and any whitespace (such as spaces or tabs) is removed from the
beginning and end of string using the trim() method, before being stored in
the searchQuery variable. Subsequently, this variable is logged to the
console.
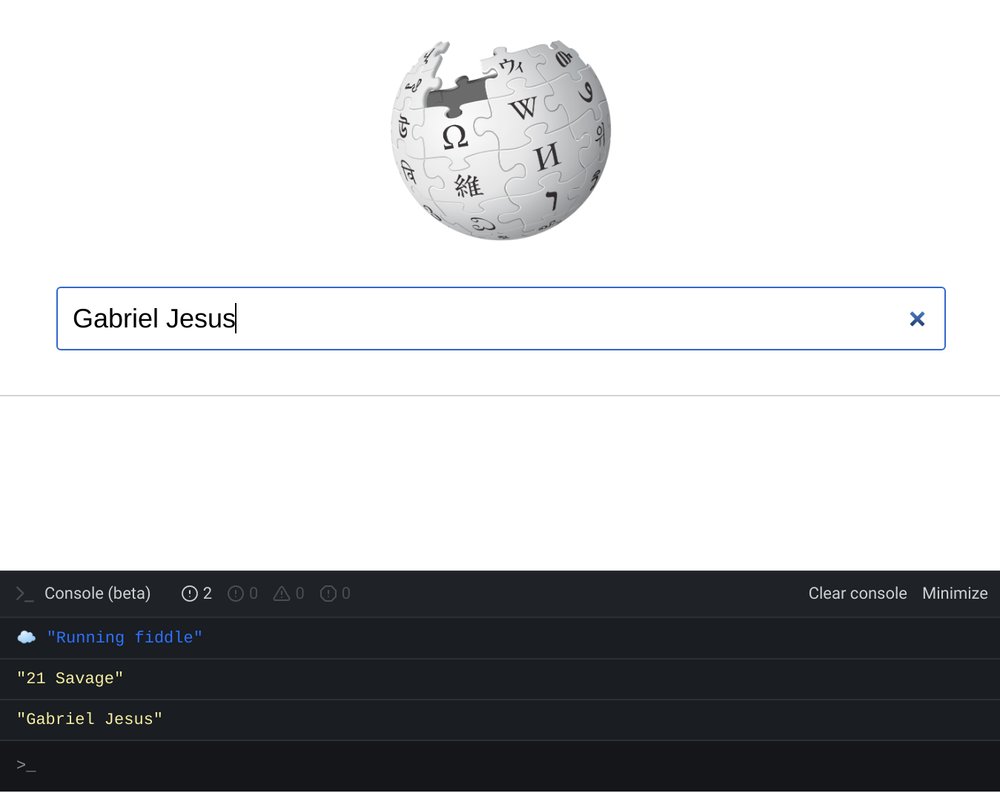
Open the console in your browser (Ctrl+Shift+J / Cmd+Opt+J in Chrome and Ctrl+Shift+K / Cmd+Opt+K in Firefox). Type something in the input field and submit the form. If your code is correct, whatever you typed into the search field will be printed to the console.
In the next section, we’ll send the search query to Wikipedia and log the response to the console.
Search Wikipedia
Our next step involves making an AJAX request to Wikipedia and handling the response that is received from the API. You don’t need to sign up for an API key, but you need to know which the endpoint and query parameters needed to receive the desired results.
This page contains all the relevant information about the parameters needed to perform a full text search in Wikipedia. I have condensed the relevant parameters into the following URL:
https://en.wikipedia.org/w/api.php?action=query&list=search&prop=info&inprop=url&utf8=&format=json&origin=&srlimit=20&srsearch=SEARCH_QUERY_GOES_HEREThis URL contains a few query parameters you should take note of:
format=jsonspecifies that we are expecting a JSON response.origin=*helps us get around CORS restrictions.srlimit=20specifies how many results should be returned per page to return (20 in this case)srsearch=contains the search query.SEARCH_QUERY_GOES_HEREis a placeholder which will be replaced by the user’s input.
Create the following function under handleSubmit():
async function searchWikipedia(searchQuery) {
  const endpoint = `https://en.wikipedia.org/w/api.php?action=query&list=search&prop=info&inprop=url&utf8=&format=json&origin=*&srlimit=20&srsearch=${searchQuery}`;
  const response = await fetch(endpoint);
  if (!response.ok) {
    throw Error(response.statusText);
  }
  const json = await response.json();
  return json;
}
This function accepts a single parameter (searchQuery), which is interpolated
into the API endpoint string as the value of the &srsearch query
parameter. The endpoint variable is passed as the parameter to fetch. We
need to wait for the promise to resolve before continuing which is achieved
through the await keyword. Note that await can only be used in an async
function and all async functions always return a promise.
If the fetch request resolves to 200 OK, the json() method is used to parse the
response as JSON which is subsequently stored in the json
variable, otherwise an error is thrown. We must make provisions to handle this
error, otherwise the program will crash with an Uncaught Error message. On the
next line, the json object returned by the Wikipedia API is
returned from the function.
Let’s call the searchWikipedia() function from handleSubmit(). We need to
use the await keyword before accessing its return value because it returns a
promise (by virtue of being an async function), and we also need to use a
try..catch block so that if the promise rejects, it will be caught and
processed appropriately.
async function handleSubmit(event) {
  event.preventDefault();
  const inputValue = document.querySelector('.js-search-input').value;
  const searchQuery = inputValue.trim();

  try {
    const results = await searchWikipedia(searchQuery);
    console.log(results);
  } catch (err) {
    console.log(err);
    alert('Failed to search wikipedia');
  }
}
At this point, if you enter a keyword in the search input and hit
Enter, the query will be sent to the Wikipedia API and,
if all goes well, the object returned from searchWikipedia() will be logged to
the console. If an error is thrown, the code in the catch block is executed
and an alert is displayed.
We’ve reached the end of this section. Let’s go ahead and display the search results on the page in the next step.
Display the results
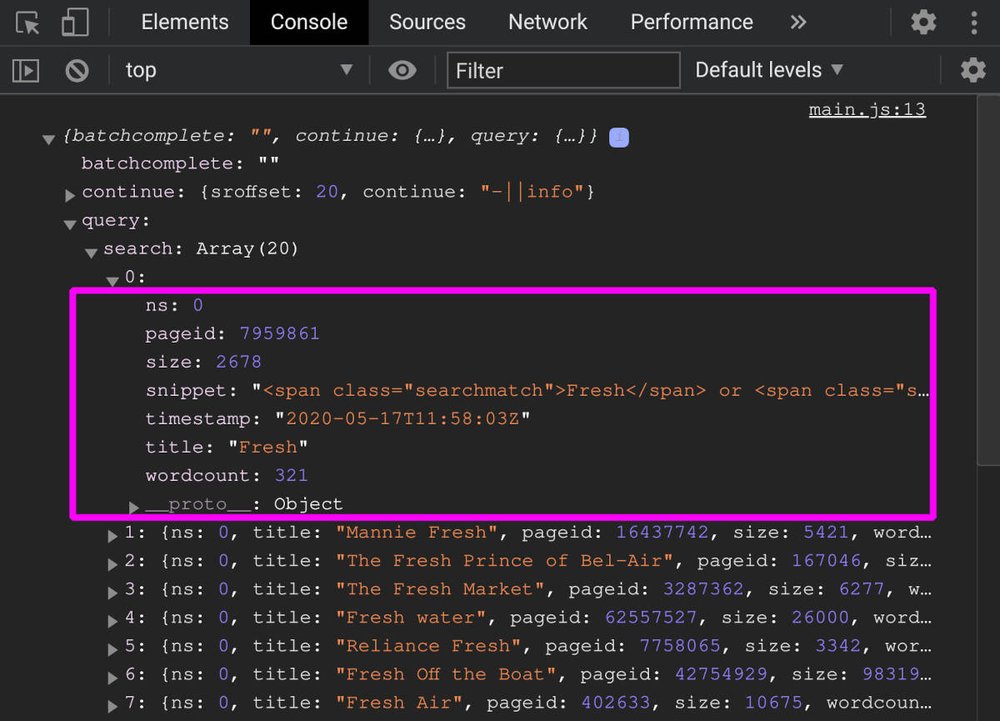
Our next task is to display the search results on the page. If you examine the contents of the raw JSON data logged to the console in the previous step, you will see that the object contains a several keys with different contents.
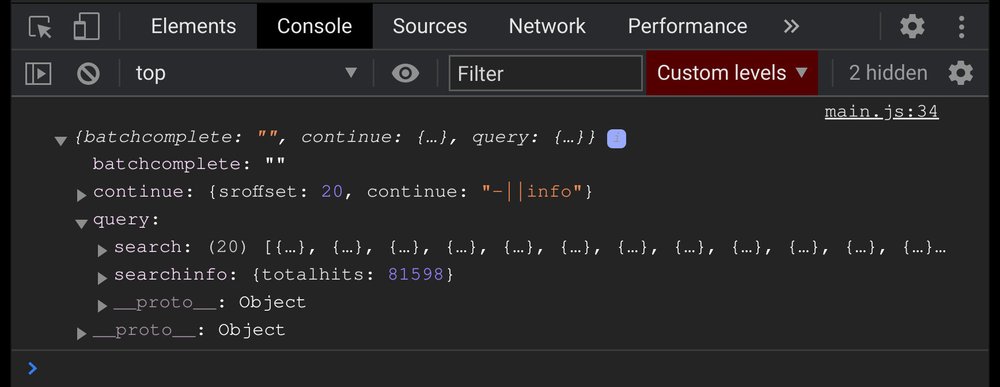
The structure of the JSON object returned by Wikipedia's API
The search property is where the search results are placed. It is an array of
objects nested inside the query object which can be accessed using dot
notation like this: results.query.search.
Create a new displayResults() function just below searchWikipedia() and
populate it with the following code:
function displayResults(results) {
  // Get a reference to the `.js-search-results` element
  const searchResults = document.querySelector('.js-search-results');

  // Iterate over the `search` array. Each nested object in the array can be
  // accessed through the `result` parameter
  results.query.search.forEach(result => {
    const url = `https://en.wikipedia.org/?curid=${result.pageid}`;

    // Append the search result to the DOM
    searchResults.insertAdjacentHTML(
      'beforeend',
      `<div class="result-item">
        <h3 class="result-title">
          <a href="${url}" target="_blank" rel="noopener">${result.title}</a>
        </h3>
        <a href="${url}" class="result-link" target="_blank" rel="noopener">${url}</a>
        <span class="result-snippet">${result.snippet}</span><br>
      </div>`
    );
  });
}
First, a reference to the .js-search-results element is stored in the
searchResults variable. Next, the search array is iterated over using the
forEach method. Within the callback function, the nested object in the array
can be accessed through the result parameter. If you check each object you
will find keys like title, snippet, timestamp and others.
const url = `https://en.wikipedia.org/?curid=${result.pageid}`;On the first line of the callback function, the link to the corresponding
Wikipedia page is generated by appending the value of the result.pageid
property to https://en.wikipedia.org/?curid=. Next, each result is appended to
the searchResults element using the DOM
insertAdjacentHTML
method.
This method takes two arguments: The position to append the element
(beforeend) and the HTML to be inserted at that position. In the
second argument, template literals are used to present the HTML in
a natural and readable manner. We also have several placeholders in the
code. These will be replaced in the final output.
Let’s see this function in action. Replace the following line in handleSubmit():
console.log(results);with the following line:
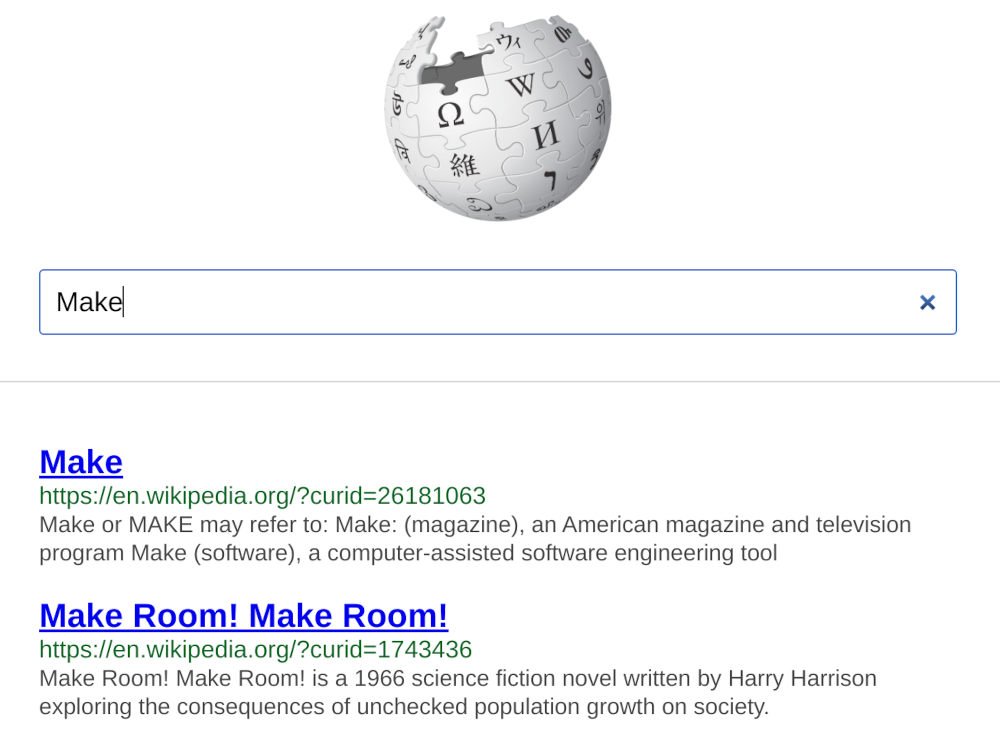
displayResults(results);Try it out by searching for something through the text input. The results should be displayed on the page appropriately.
Show a loading indicator
Let’s show a loading indicator when a search query is in progress. This signals to the user that an operation is currently running in the background and its completion should be awaited.
The code for the loading indicator was lifted from this website. The HTML and CSS used to create each effect can be accessed by clicking the Source link at the top of the page.
Go ahead and update your handleSubmit() function as shown below:
async function handleSubmit(event) {
  event.preventDefault();
  const inputValue = document.querySelector('.js-search-input').value;
  const searchQuery = inputValue.trim();

  const searchResults = document.querySelector('.js-search-results');
  // Clear the previous results
  searchResults.innerHTML = '';

  const spinner = document.querySelector('.js-spinner');
  spinner.classList.remove('hidden');

  try {
    const results = await searchWikipedia(searchQuery);
    displayResults(results);
  } catch (err) {
    console.log(err);
    alert('Failed to search wikipedia');
  } finally {
    spinner.classList.add('hidden');
  }
}
Just before searchWikipedia() is invoked, the hidden class is taken off the
spinner element which causes the loading indicator to come into view. The
class is added again in the finally block which hides it again.

Display an alert when there are no results
It’s possible for a search query to yield no results. If that happens, no
results will be displayed on the page. But it’s better to also show an alert to
notify the user that no results was found for their query. This can be achieved
by adding the highlighted portion of the snippet below to the handleSubmit()
function:
async function handleSubmit(event) {
  // [..]

  try {
    const results = await searchWikipedia(searchQuery);
    if (results.query.searchinfo.totalhits === 0) {
      alert('No results found. Try different keywords');
      return;
    }

    displayResults(results);
  } catch (err) {
    console.log(err);
    alert('Failed to search wikipedia');
  } finally {
    spinner.classList.add('hidden');
  }
}
The totalhits property contains the total number of results available for a
query. If this number is zero, it means no results were found and we are able to
display and alert encouraging the user to try a different query before returning
from the function. Note that the code in the finally block is still executed
even after returning early from the function which causes the spinner to be
hidden again.
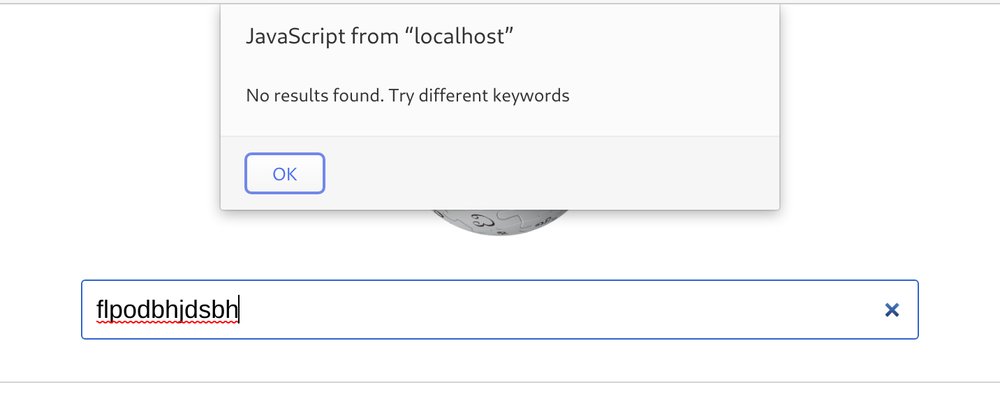
An alert is displayed to the user if a query yields no results
Conclusion
At this point, you’ve successfully built a search engine for Wikipedia. Congratulations!
To challenge yourself further, try to improve the application with some additional features. For example, you could add the ability to paginate through results so that a user can go to the next or previous page just like a regular search engine.
Thanks for reading, and happy coding!